A Recipe from Rebecca: Nettle-Onion Pakoras with Wild Garlic Raita
Now is the time of year to forage for nettles and wild garlic. There are lots of things you can do with nettles, but a nettle-onion pakora is one of the best uses. Serve them with a bit of raita made from yoghurt, Canalside coriander and a chiffonade of wild garlic, and perhaps a beer. I hardly need to tell you to wear gloves whilst you collect your nettles, but it’s perhaps worth saying that the nettle tops are the best bits to use for this recipe. Once you blanch the nettles in hot water they will lose their sting, allowing you to enjoy their minerally, spinach-like taste. They combine perfectly with the nutty flavour of chickpea flour. If you can’t find any wild garlic, use double the amount of coriander instead.
Nettle-Onion Pakoras with Wild Garlic Raita
Serves 4 as a snack or 2 as a main
Ingredients
Raita
100g natural yoghurt
1 tablespoon fresh Canalside coriander, chopped
1 tablespoon wild garlic leaves, chopped (or use double the amount of coriander instead)
1 pinch sea salt
Pakoras
1 medium Canalside white onion, peeled
1 tablespoon lemon juice (or cider vinegar)
½ teaspoon salt
100g nettle tops
1 tablespoon fresh ginger
¼ Canalside dried chile (or more to taste), finely chopped
1 clove garlic, mashed to a paste with a little salt
1 teaspoon turmeric
1 teaspoon fennel seeds or cumin seeds
1 teaspoon ground coriander
½ teaspoon baking powder
100g chickpea (gram) flour
Up to 100ml tap water
Vegetable oil for frying
Method
For the Raita
Mix all the ingredients together and set aside while you prepare the pakoras.
For the Pakoras
Slice the onion into fine strips, place in a small bowl, and mix with the lemon juice (or vinegar) and salt. Set aside and leave for at least 15 minutes, to allow the flavour to mellow.
Pour some boiling water into a large pan and (wearing gloves) plunge in the nettles. Blanch in the hot water for 60 seconds and then drain thoroughly. They will no longer sting. Let them cool a bit, and then, using your hands, squeeze out as much water as you can.
Roughly chop them and place them in a large bowl. Add the ginger, garlic, spices and baking powder to the nettle bowl, along with the onion and any accumulated liquid. Mix everything well. Sift in the chickpea flour and slowly add water to make a sticky dough.
In a frying pan heat enough vegetable oil to coat the bottom of the pan over medium heat. Once it’s hot, drop in spoonfuls of the pakora batter, to make pakoras of your preferred size. We made 5 but you can make smaller ones if you like. Flatten the tops a bit with a fish slice and fry for about 2 minutes before turning over and frying the other side for another minute or so. As they cook remove them from the pan onto some paper towels to absorb any excess oil.
Serve with the raita, and perhaps a small glass of beer.
Recipe adapted from The Foraging Course Company
Veg in the Spotlight – Spring greens


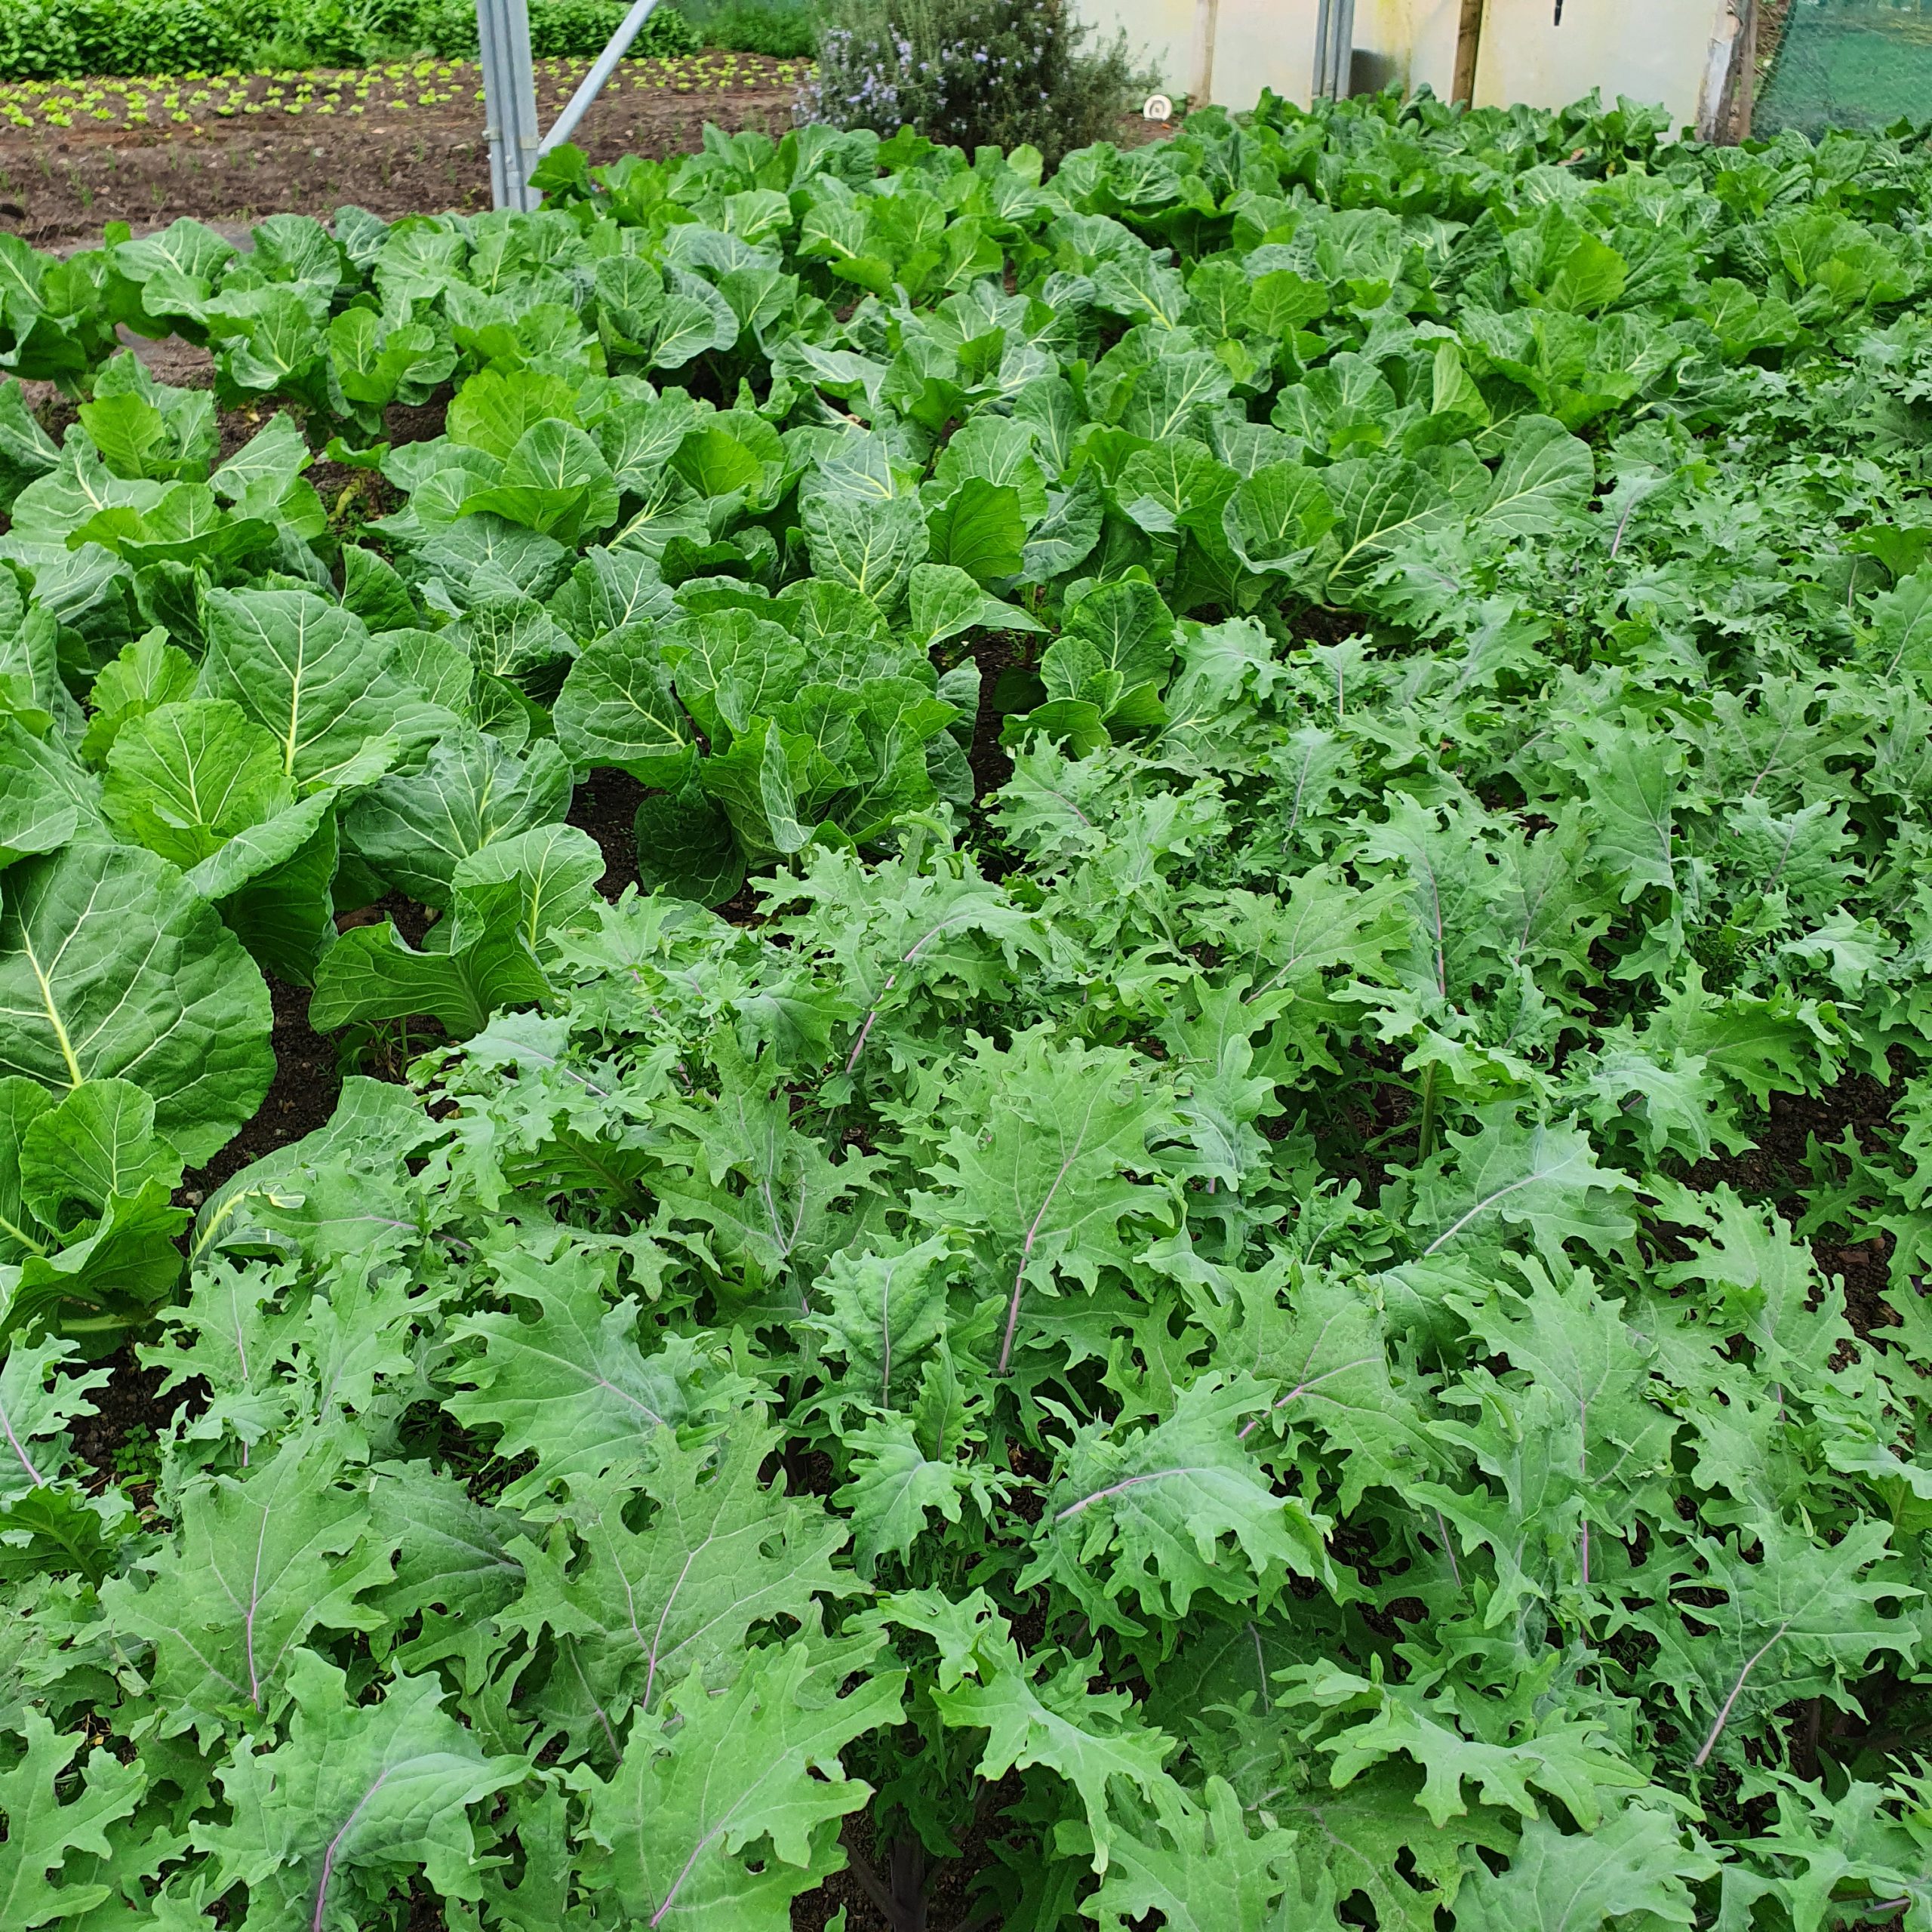
Spring greens are a member of the brassica (cabbage) family of vegetables and are essentially the first cabbages of the year. As such they form an essential part of the Canalside veg share during early spring – as you will have seen from having them in your veg share for the past few weeks. Their leaves don’t form hard hearts like other cabbages, instead growing as loose leaves that are plucked from the plant. This allows more leaves to grow, meaning leaves can be harvested from the same plant over a period of weeks.
As a leafy green vegetable, spring greens are rich in iron, as well as a great source of vitamins C, E and K, and calcium, potassium and fibre too! They are delicious steamed / cooked as you would cook Savoy/white cabbage, brussels sprouts etc. and served generously seasoned with salt and pepper and a dollop of butter. Don’t discard the stems – just slice them a little more thinly than the leaves. As with all brassicas, it’s best to avoid overcooking to enjoy the best flavour.
Why not try other ways of cooking them:
As the star attraction with extra nuggets of deliciousness:
– Fry pieces of bacon or pancetta until browned and then add sliced spring greens and continue cooking until tender
– Stir fry with chopped garlic cloves and fresh chilli then add a dash of soy sauce before serving
Added near the end of cooking to your favourite recipes, as an addition or in place of cabbage, spinach or chard:
– Stir fries
– Risotto
– Stews and casseroles
– Pasta dishes
– Juices
More culinary inspiration here:
BBC Good Food
Olive Magazine
BBC website food section
Ideas from Ali
A Recipe from Rebecca: Carrot Halwa
This recipe for carrot pudding, or gajar ka halwa, was contributed by Arushi Goyal to a cookbook I edited a few years ago. It is sweet and comforting. She describes it as ‘one of the most famous sweet dishes in India, especially during the winter season’. (Ali adds: This is also perfectly timed, with Muslims celebrating Eid-ul-Fitr this weekend after the Islamic holy month of Ramadan ends: gajar ka halwa will no doubt feature in many Eid celebrations across the Indian subcontinent and beyond!)
Gajar ka halwa
Serves 4-6.
Ingredients
Skimmed milk powder
1 big bowl of ghee (Ghee is a clarified butter made from buffalo or cow milk, used in Indian cooking. It can be found in the Asian section of Tesco.)
Whole milk
8 carrots
1.5 cups of white sugar (it can be decreased or increased depending upon taste)
Method
First prepare the ‘khoya’. (Khoya or khoa is a milk food widely used in the Indian cuisine, made of milk thickened by heating in an open iron pan.) To make it, take skimmed milk powder and add ghee to it. All the powder granules should be mixed with the ghee. Then add whole milk to the above mixture to form a thick batter. Place it in the microwave for 1 minute and take it out. Stir it and repeat this procedure two more times. So, in totality, the microwave time should be 3 minutes and the person should have stirred 3 times. The khoya is ready.
Now prepare the carrot pudding: take carrots, wash them, peel them and grate them by using a grater. Take a big pan which can accommodate grated carrots and the other ingredients. Add 2.5 tablespoon of ghee in the above pan. When the ghee melts, add the grated carrots and mix it properly. Now add milk until the grated carrots are submerged under the milk. Stir it at regular intervals. If carrots absorb most of the milk and still they look like as if they were not completely steamed, add more milk. Don’t add water.
When grated carrots have absorbed most of the milk, add the prepared khoya. Also add the sugar and then stir it again. When everything is mixed and absorbed properly, switch off the knob and the carrot pudding is ready.
Special point: Always stir the mixture at small regular intervals otherwise the pudding will stick to the pan.
Recipe by Arushi Goyal, in Simple Scoff: The Anniversary Edition, edited by Rebecca Earle (2015).
Veg in the Spotlight – Beetroot
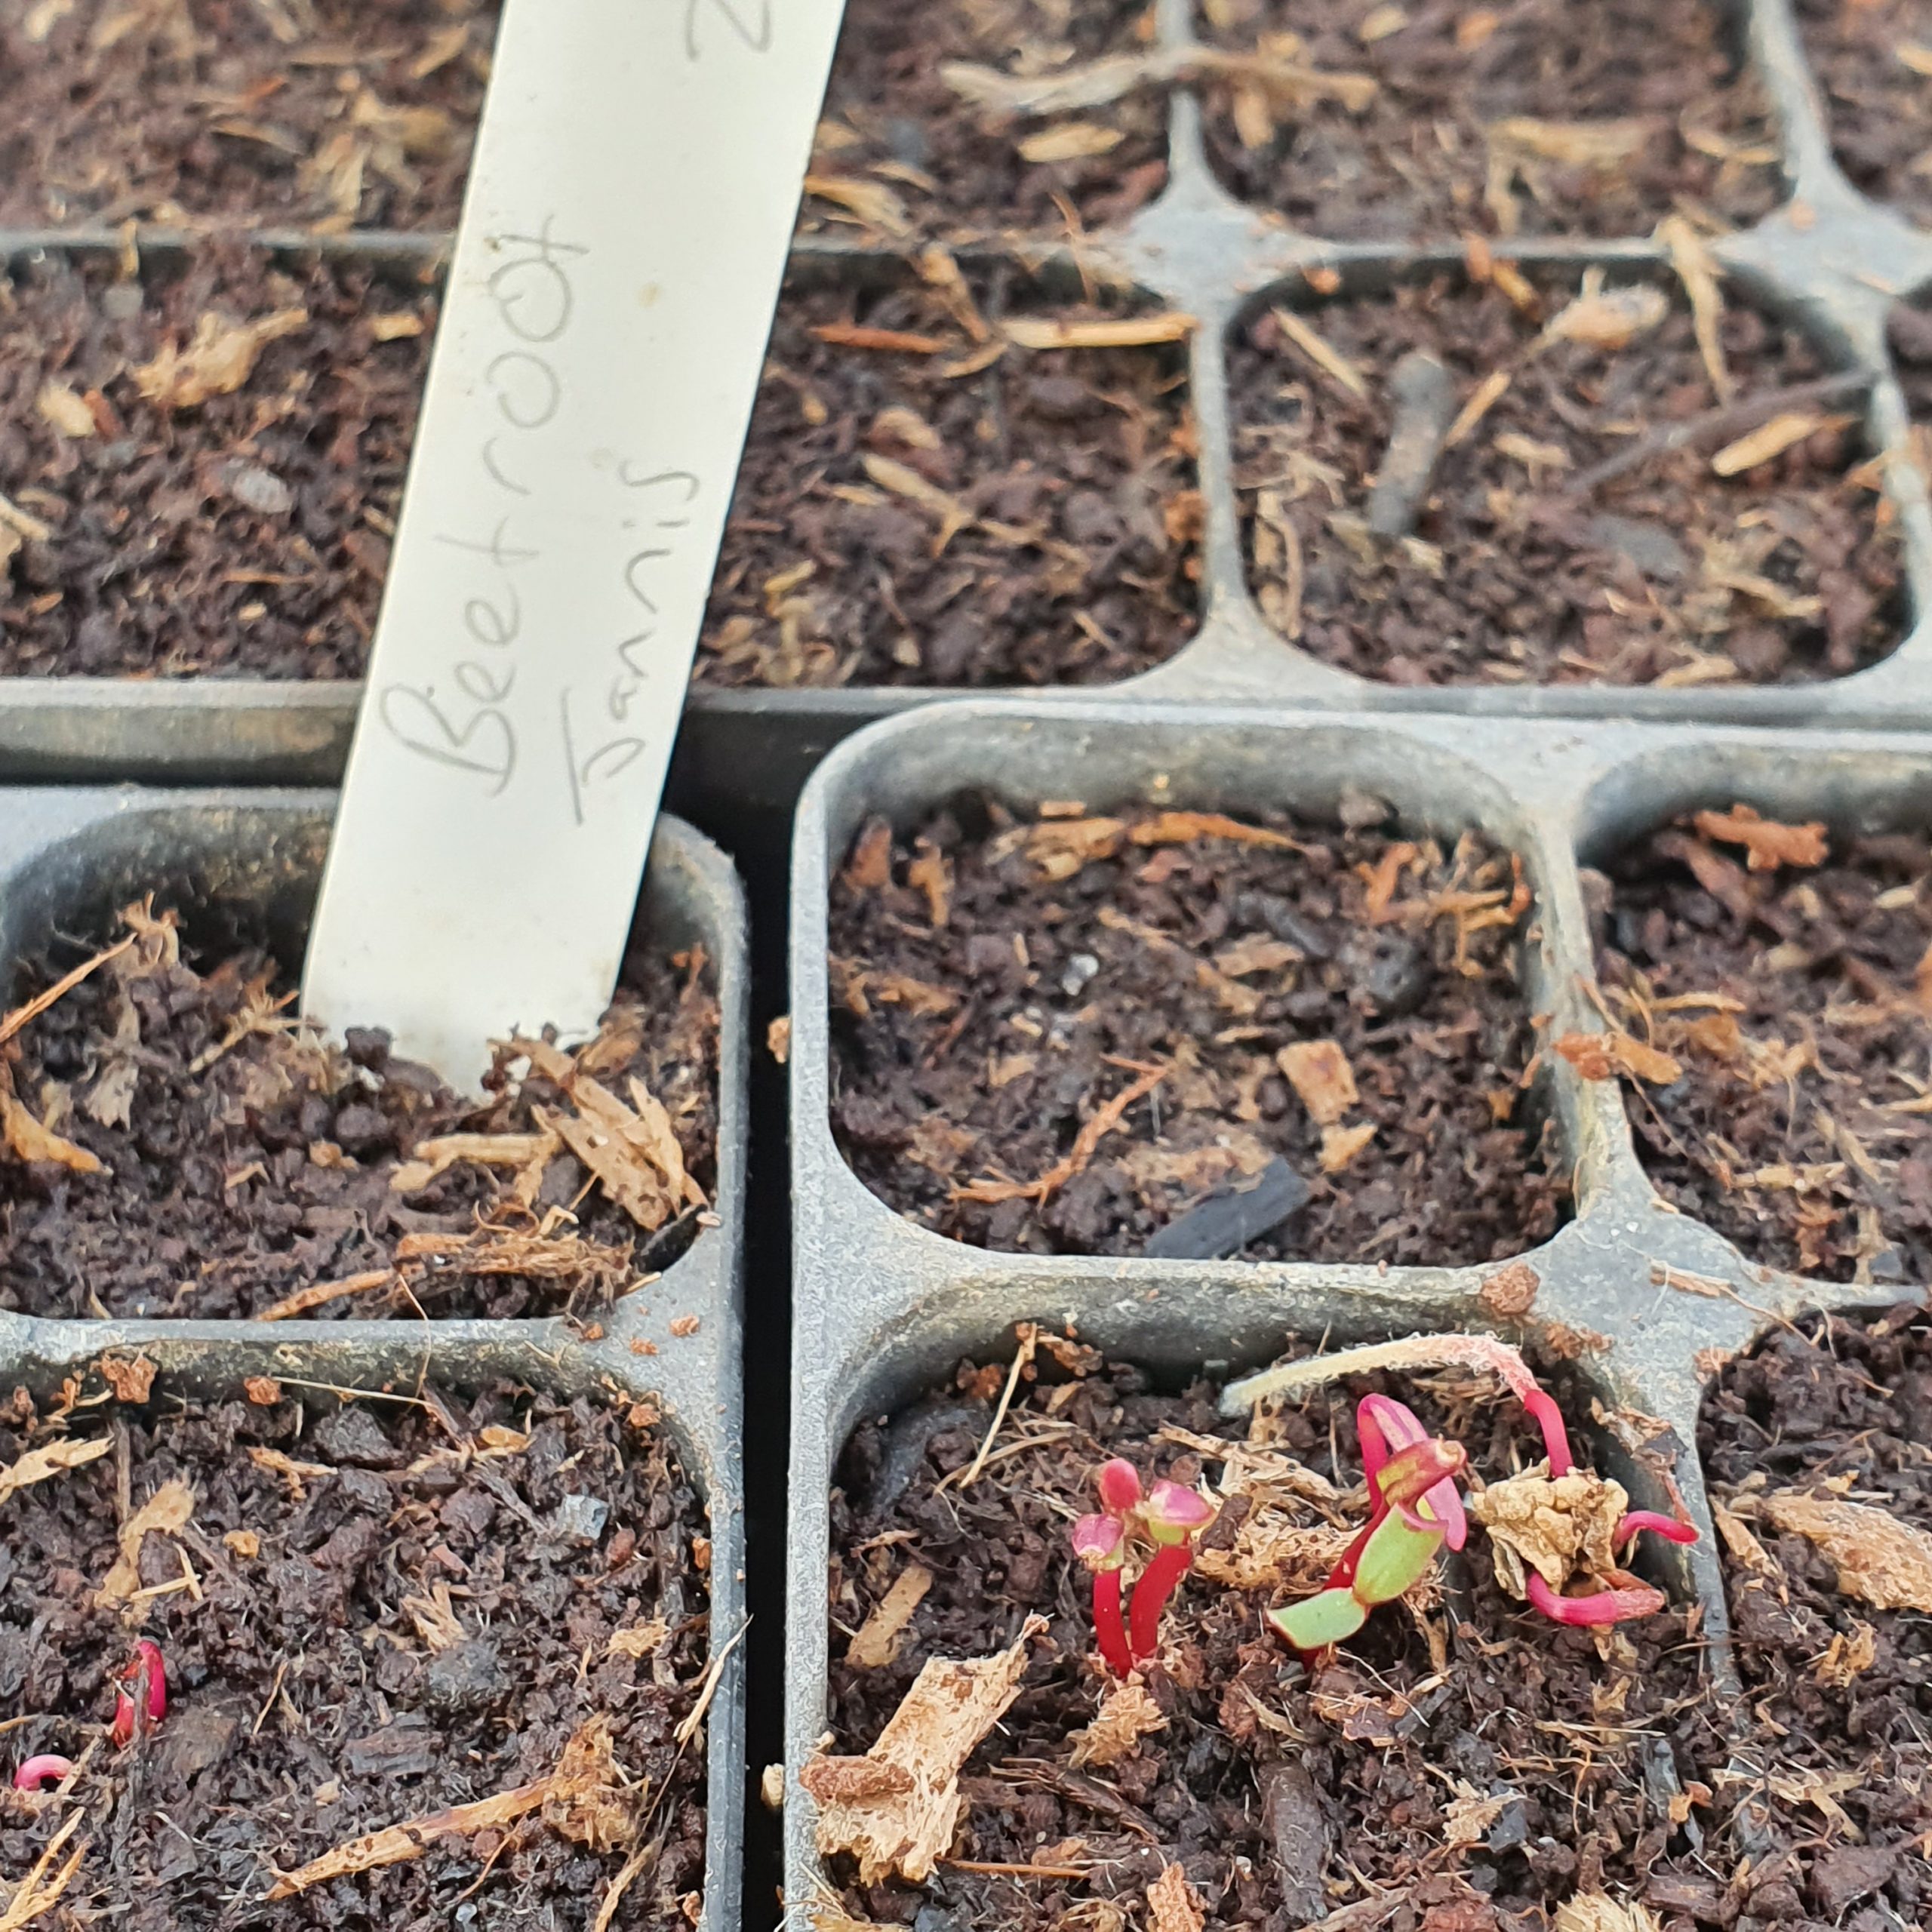
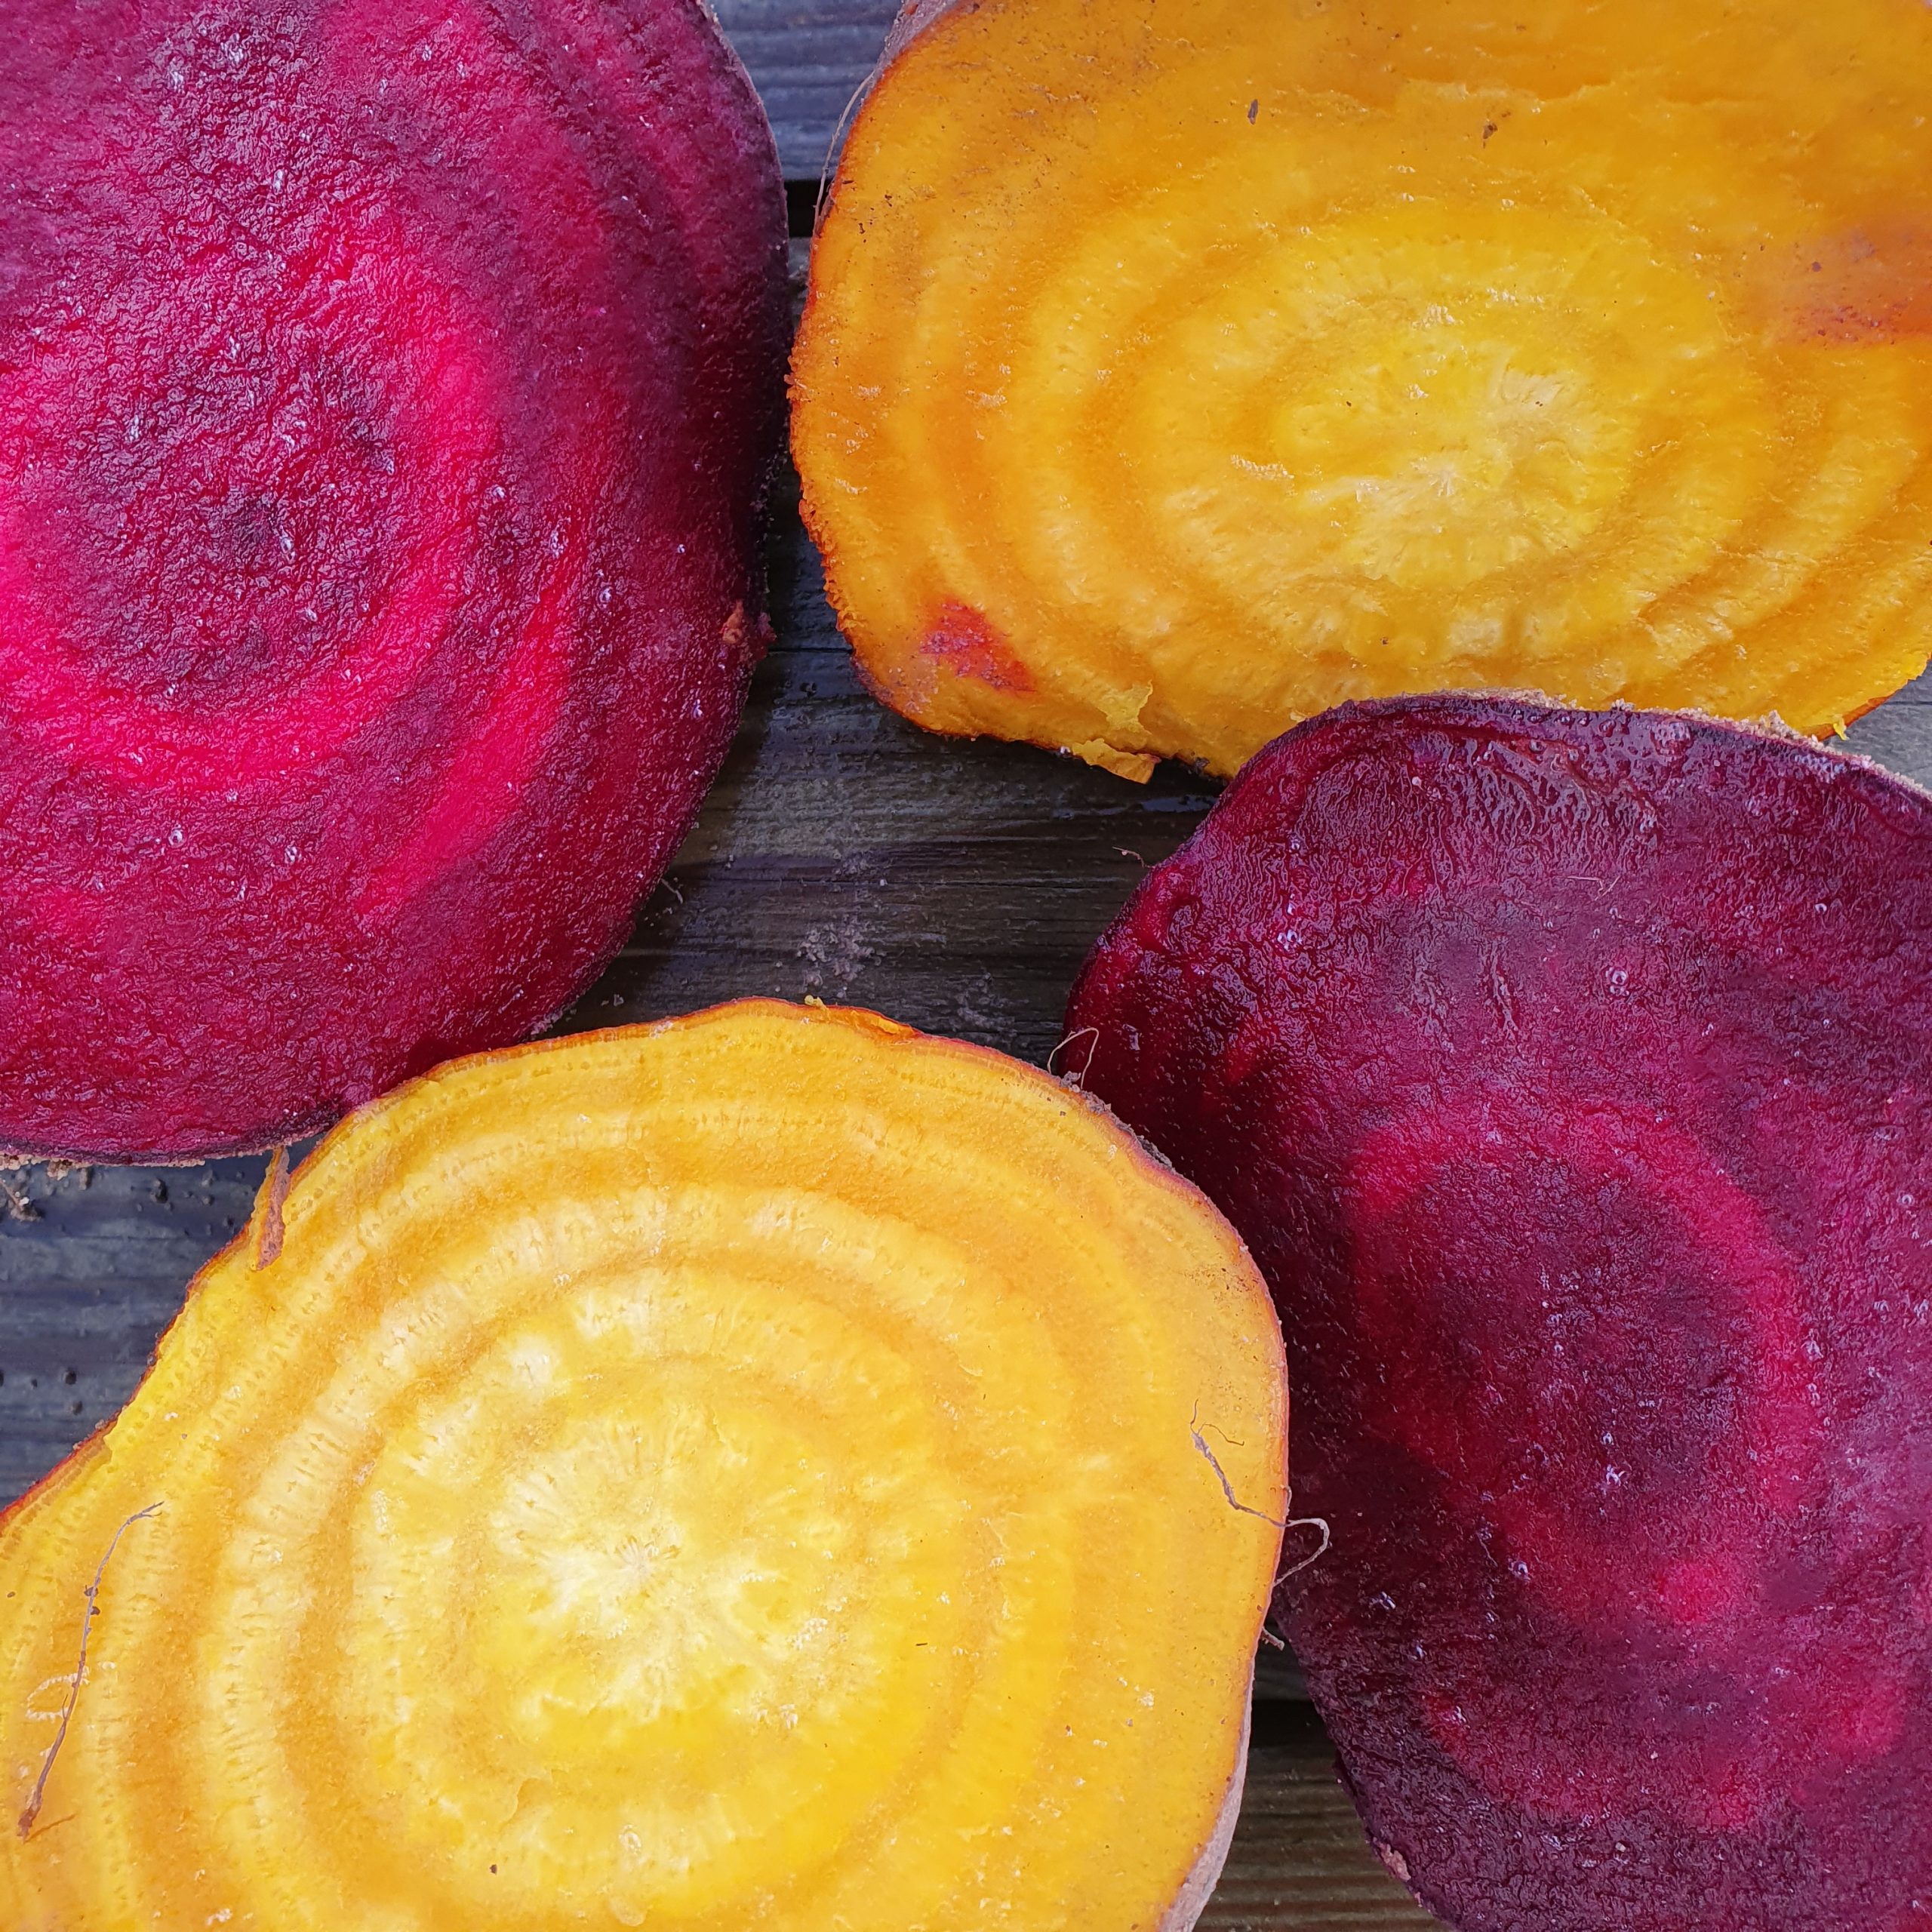
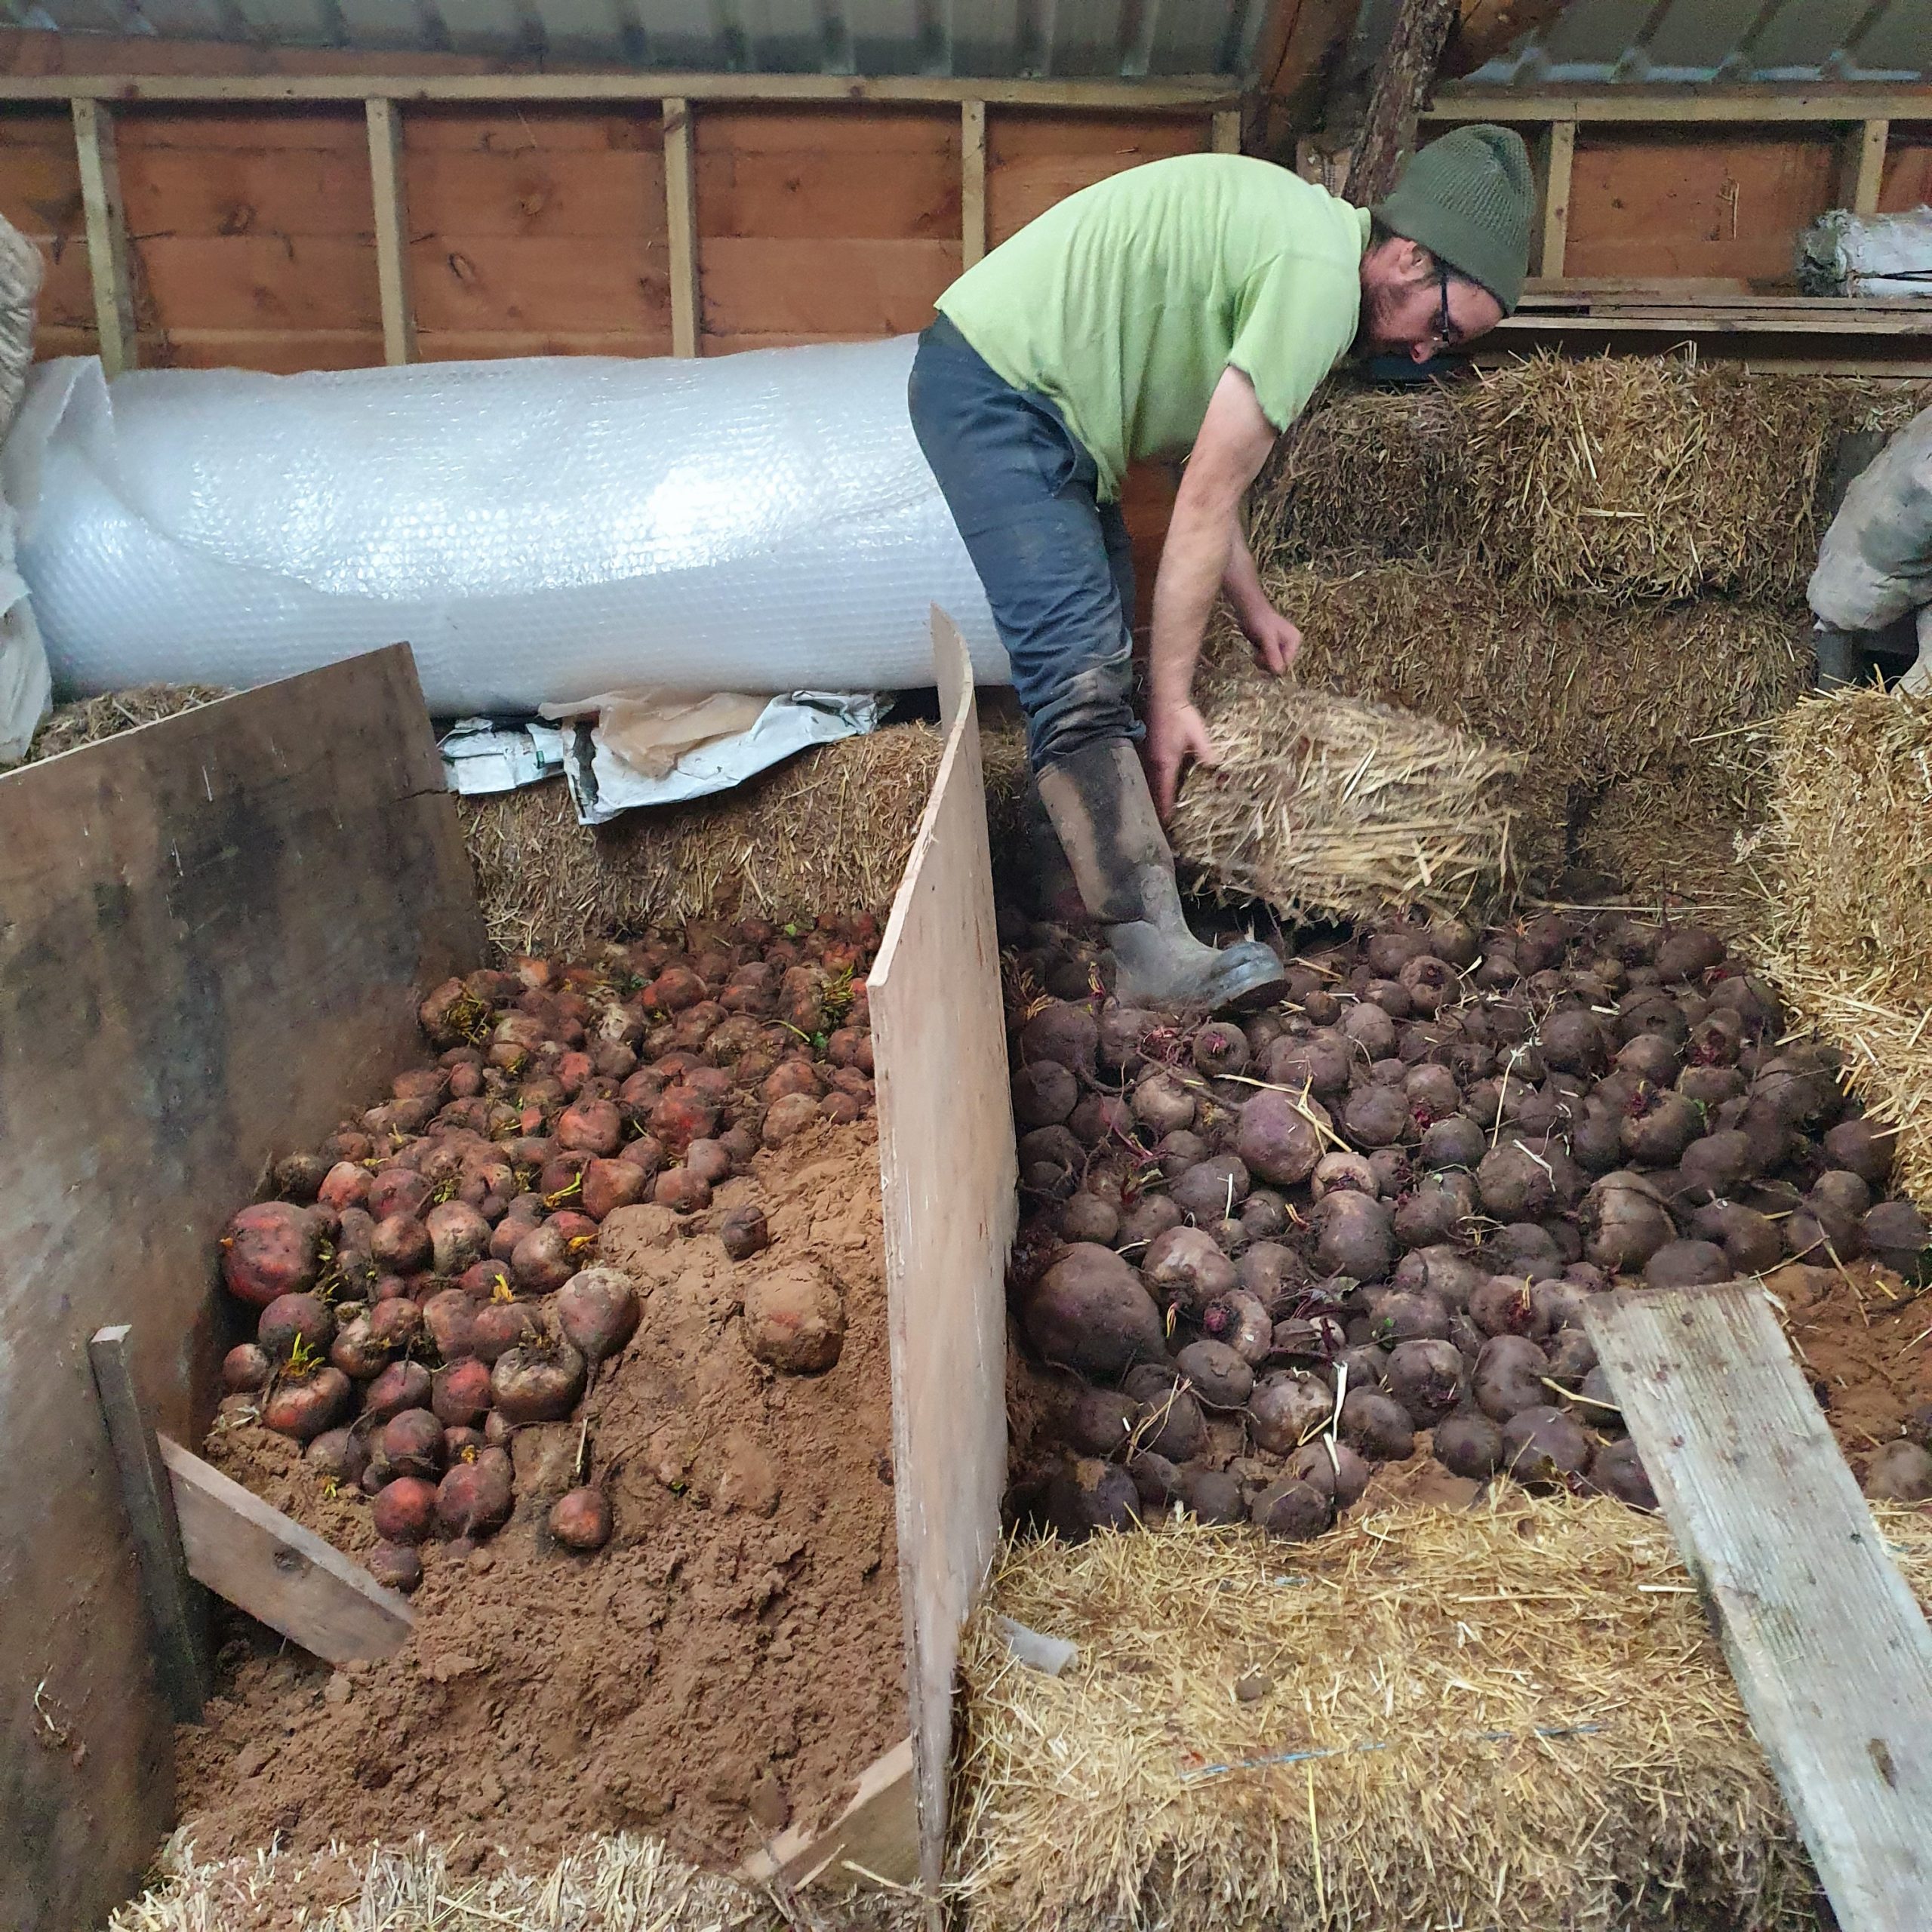

Beetroot (both golden and purple/red) have been in a share regularly over recent weeks as we had a good harvest last year. They are a staple of our winter shares since we can store them well in damp sand ‘clamps’ through the winter and into the spring. Here are a few ideas for how to use them if you’re finding it difficult to get through the quantities in the share:
Beet kvass – fermented beets
Fermenting is a great way to increase the nutritional value of a food by introducing ‘friendly’ bacteria that help give a diverse microbiome in the gut when they are eaten. It also helps to extend the shelf life of food and spread useable period across a longer stretch of time, as you can be eating the food fresh while a batch is fermenting and then eat the fermented foods after that.
Here’s a link to the recipe I’ve been using for several years. It produces tangy cubes of beet and a thick liquid you can drink as a tonic or use in a number of other ways suggested in the recipe. If it develops a white scum on the surface, just mix it in. Use something to keep the beets below the surface, eg. a jam jar that fits exactly inside your fermenting container (a larger jar in my case), and this will prevent lumps of mould forming.
Beet soup aka borscht (this is an adaptation of the recipe in my old and well used copy of the Cranks recipe book)
Chop an onion and fry it until it’s beginning to soften. Add c. 450g beetroot cubed, a medium potato also cubed, a stock cube or a teaspoonful or so of yeast extract, a bay leaf and water to cover. You can also increase the nutritional value by adding red lentils, maybe 100-150g and increasing the water. When everything is cooked (though the beets might still be quite firm), remove the bay leaf and blend until smooth. Add some ground nutmeg (not too much as it’s strong), freshly ground black pepper and cider vinegar (or whatever vinegar you’ve got would probably be fine) – c. 1-2tbsp, to taste – it gives the soup a little bit of a sour edge. If you’ve got liquid from your beet kvass to use, you could add this once it’s off the heat – cooking it will kill all those lovely bacteria I mentioned above. Serve with a dollop of sour cream/crème fraiche/natural yoghurt and a sprinkle of parsley if you have some. According to the toddler in the house, the yoghurt is the main feature and she will devour quite a bit from eating the thin layer yoghurt that sits above it! (Sneaky mama trick!)
Other ideas:
Juiced – you could use a blender, some water and a piece of muslin if you don’t have a fancy juicer
Grated into a winter slaw
Roasted in chunks, with olive oil (add slivers of orange zest and a squeeze of fresh orange juice for extra zazoom)
Thinly sliced and crisped in the oven to make beetroot crisps
In brownies/cakes
Ideas from Ali and the grower team
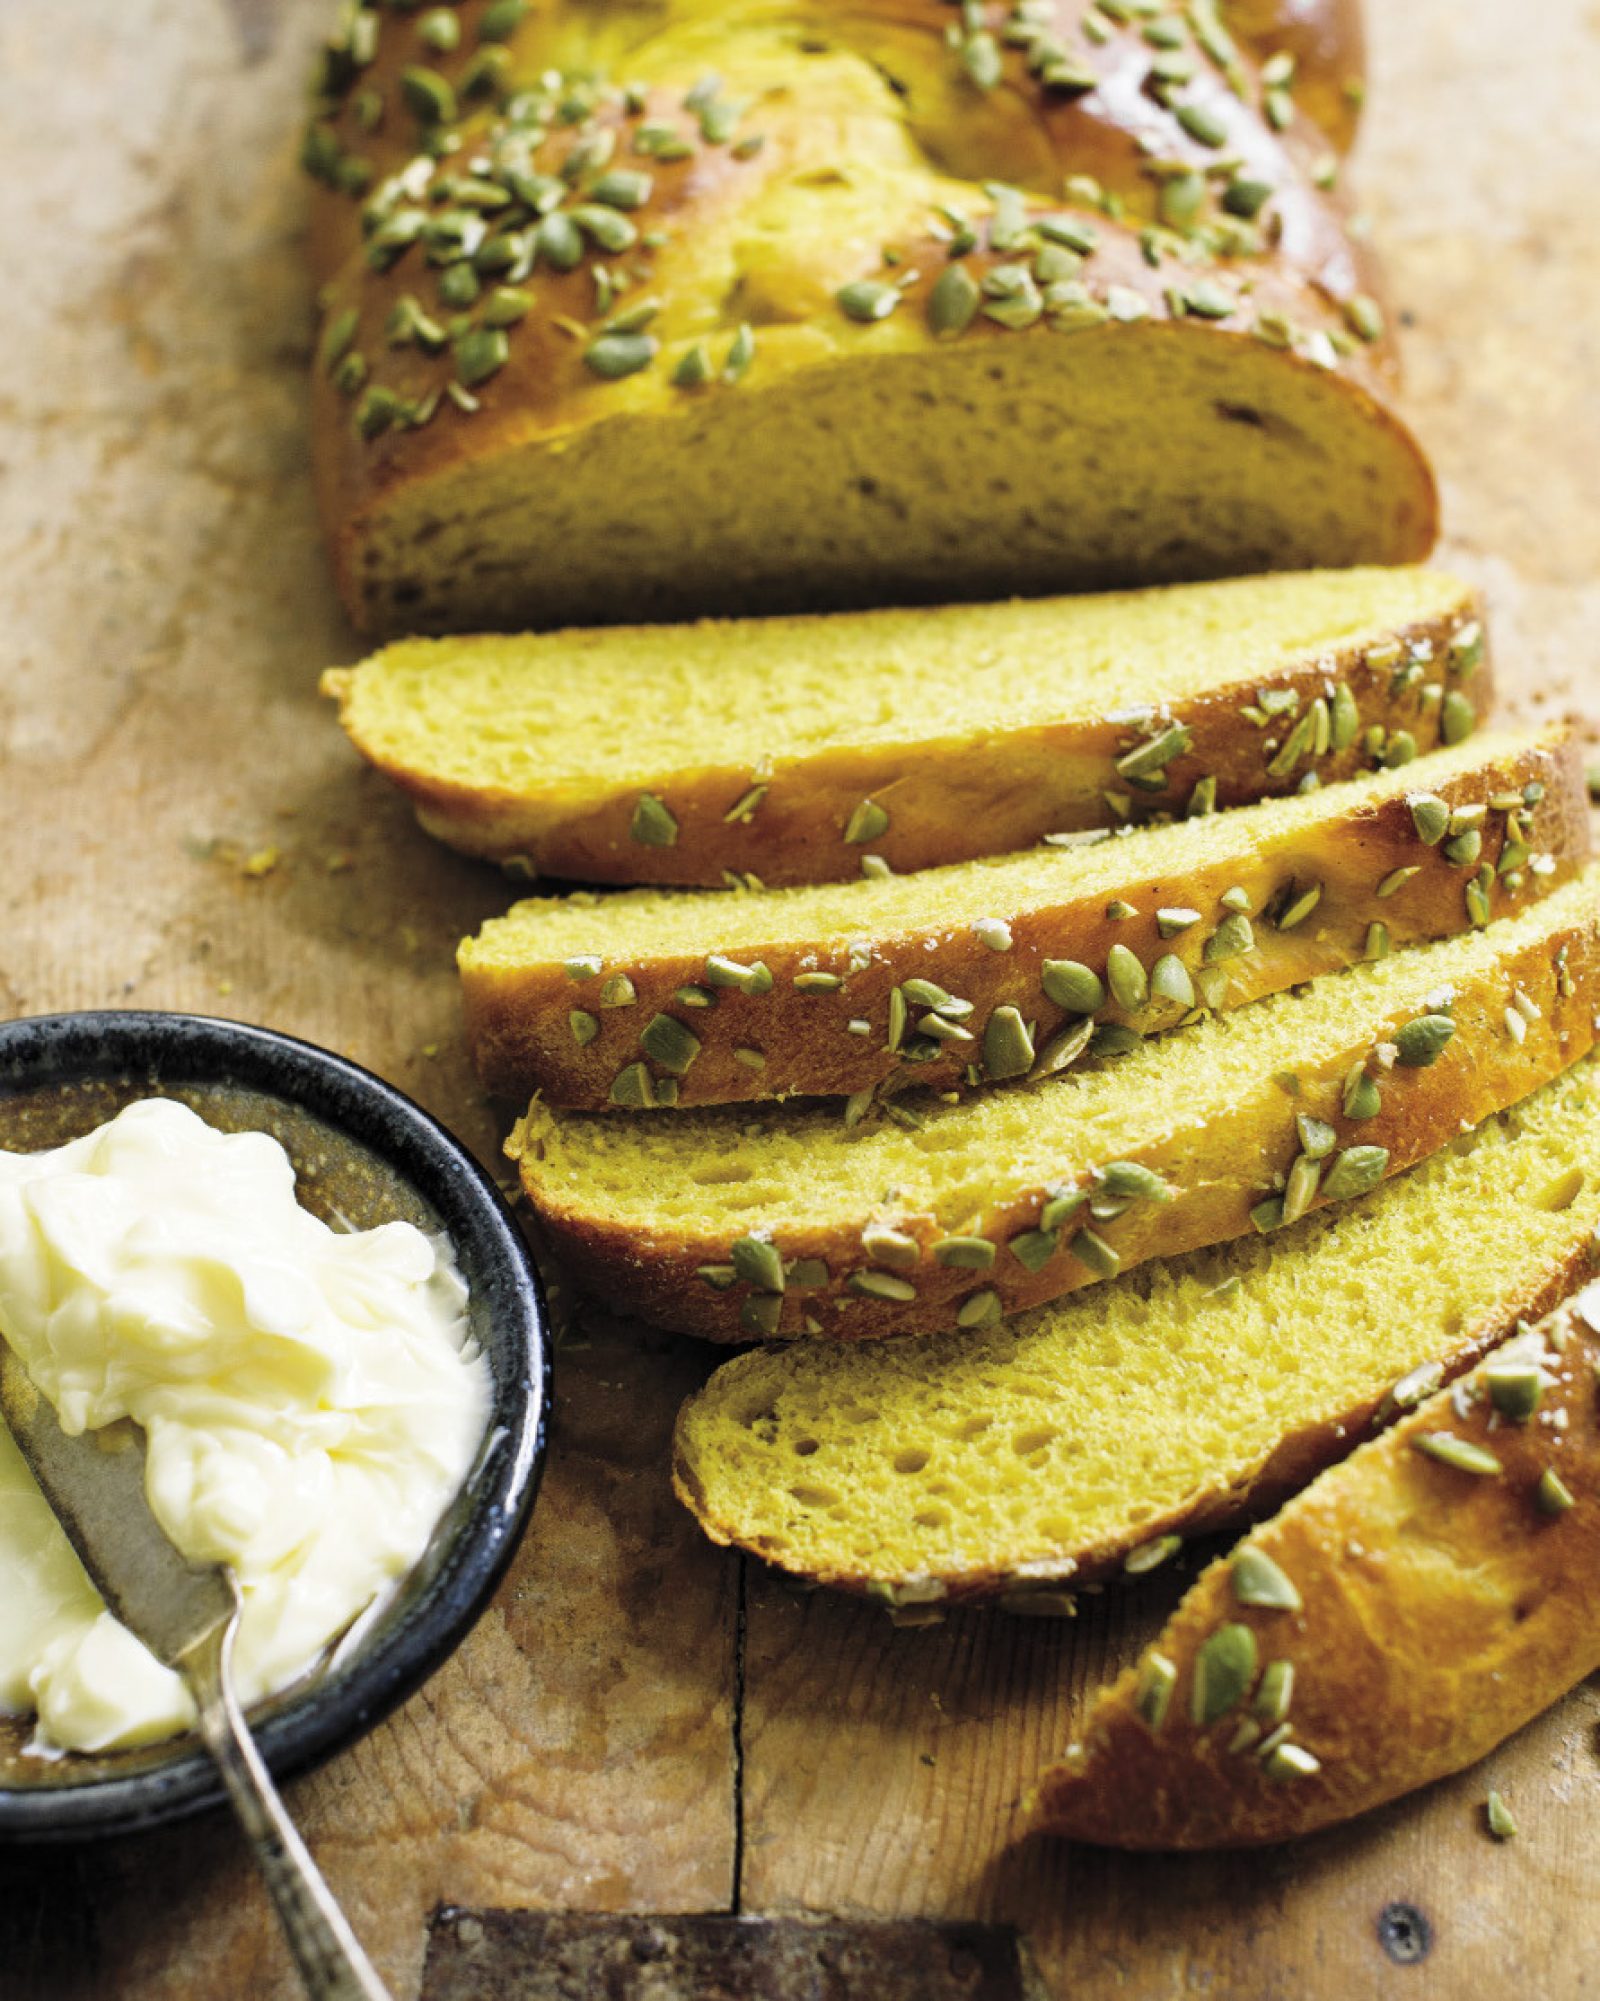
A Recipe from Rebecca: German-Style Pumpkin Bread
Here is a relaxing weekend baking project to use that uneaten chunk of squash you got in the
last share. The recipe does not demand a lot of your attention but it does take quite a bit of
time, since you need to roast the squash, the dough needs to rise and rest in the fridge. The
result is a soft, golden brioche-like bread with a moist crumb. It’s very good with unsalted
butter.
Since the dough is quite sticky it’s best to make this recipe using a stand mixer. In fact, Milk
Street (whose recipe this is) states that ‘it would be difficult to make this dough by hand’, so I
didn’t even attempt to do so.
Kürbisbrot
Makes 1 loaf
Ingredients
700g-1kg winter squash or pumpkin, chopped into wedges
4 tablespoons milk (I used Oatly barista), plus a little more to brush over the loaf before
baking
2 tablespoons runny honey
2 large eggs
400g plain flour, plus possibly a little more
1 teaspoon easy-blend yeast
1 teaspoon allspice
1 teaspoon salt
4 tablespoons butter, softened
3 tablespoons pumpkin seeds, coarsely chopped
Method
Heat the oven to 200C. Place the squash or pumpkin on a baking sheet and bake for 30 to 40
minutes or until it is soft and tender. Remove from the oven and set aside to cool.
Once the squash is cool enough to handle, cut off the rind (or just scoop out the flesh with a
spoon). Measure out 230 grams of the soft, cooked flesh for use in this recipe. You can use
the rest to make pumpkin muffins, or you can freeze it, or do with it what you will.
Put your 230 grams of squash/pumpkin into a medium bowl and add the milk, honey, and
eggs. Whizz it up with a hand blender, or mash it carefully, until it is smooth. Set aside.
In a stand mixer fitted with the dough hook, combine 400g of flour with the yeast, allspice
and salt. Mix on low for about 20 seconds to blend, and then add the squash/pumpkin
mixture. Scrape down the sides and continue to mix for about two more minutes, or until a
wet, somewhat lumpy dough begins to form. Increase the speed to medium and knead for 6
minutes or so, or until the dough begins to pull away from the sides of the bowl. If it
continues to stick to the bowl you can add a few tablespoons more flour and knead for about
two more minutes.
Add the butter, one tablespoon at a time, mixing thoroughly after each addition. After all the butter has been added, knead for another eight to nine minutes. The dough should be smooth and elastic, and pull away from the sides of the bowl. When you lift the dough hook, the dough should fall from the hook in a single mass. If it breaks into pieces, continue to knead for another few minutes until it does.
Scrape the dough into an oiled mixing bowl and put it somewhere warm to rise. Let it rise until double (about an hour), and then put it in the fridge. Leave it there for at least four hours, or overnight.
After this time has elapsed, take the dough out of the fridge and tip it onto a work surface. Divide it into three equally-sized portions. Roll each into a 45cm-long rope. Plait the three ropes together, pinching the ropes together at each end. Gently tuck each end under the plaited loaf, so that it looks attractive. Place it on an oiled baking sheet.
Cover the loaf with a tea-towel and put it somewhere warm to rise. When it has doubled in size, and the top springs back gently when you press it with a finger-tip, it is ready to bake.
Heat the oven to 180C. Very gently, brush the loaf with a little milk and sprinkle with the pumpkin seeds. Bake for 25 to 35 minutes, until it is golden brown. The inside temperature should be about 88C, if you happen to have a bread thermometer. Remove from the oven and cool on a rack for at least an hour before slicing.
Recipe adapted from Milk Street (https://www.177milkstreet.com/recipes/german-style-winter-squash-bread), 2022.
A Recipe from Rebeccca: Fish, Spinach, Garlic
This light, spring-some stew is green from the peas and spinach, and full of subtle fennel flavour. A punchy garlic mayonnaise adds richness and complexity. It’s really good with sourdough bread.
When we served this a week ago the guests were very surprised to learn the recipe comes from Sainsburys Magazine.
Simple Fish Stew with Aioli
Serves 4
Ingredients
For the Aioli
1 teaspoon salt
3 cloves garlic, peeled
1 egg yolk
1½ teaspoons lemon juice (or more to taste)
150ml olive oil
For the Fish Stew
2 tablespoons olive oil
400g celery stalks, finely chopped
400g fennel bulb, finely chopped
300g onions, finely chopped
3 springs dried or fresh thyme
Salt and pepper, to taste
3 bay leaves
1 teaspoon fennel seed
3 whole cloves
4 strips pared lemon zest
600-800ml water or fish/vegetable/chicken stock
800g skinless haddock or pollock fillets, cut into 4cm-wide chunks
3 tablespoons Pernod or other anise-flavoured liqueur
200g frozen peas
200g fresh spinach
To Serve
The aioli
Lemon wedges
Pepper flakes, if desired
Method
For the Aioli
Crush the salt and garlic in a mortar and pestle and place in the mini-bowl of a food processor, or the mixing container of your hand-blender. Add the egg yolk and lemon juice. Wizz up. With the motor running, very slowly drizzle in the olive oil, drop by drop. Continue adding the oil very slowly until the mixture begins to thicken, at which point you can increase your rate of drizzling in the oil to a thin stream. The mixture should thicken up nicely to form a thick mayonnaise. Set aside to let the flavours mellow.
For the Fish Stew
Heat a large pan with a lid over medium heat and add the oil. Once it is warm add the celery, fennel and onion, along with a pinch of salt and a grind of black pepper. Stir, reduce the heat to low, add the lid, and cook very gently for 5-15 minutes, until the vegetables are soft but not coloured. Add the herbs and spices, and strips of lemon, and stir for a few more minutes. Add 600ml of liquid and bring to a simmer. Simmer for 5 minutes (maybe 10 if you’re using water), to let the flavours meld. Now take a look: if there is not enough liquid to your taste, add the remaining water or stock and bring to a simmer.
Add the chunks of fish, cover again, and cook over low heat for about 3 minutes, or until the fish is beginning to look opaque on the top. Add the Pernod, peas and spinach and replace the lid. Turn the heat to medium and continue to cook for 2-3 more minutes, or until the spinach has wilted. The fish should be opaque on the top. Stir gently to blend everything together.
To Serve
Taste the aioli. Add more lemon juice, salt or pepper if you think the flavour needs boosting. Fish the bay leaves, cloves and thyme stems out of the stew if you wish (and can find them.)
Serve the stew, and let each person add a dollop of aioli to their bowl. Provide some lemon wedges and perhaps some red pepper flakes so people can personalise their bowl to taste. This is very nice served with good bread, and perhaps an additional drizzle of olive oil on both stew and bread.
Recipe adapted from Sainsburys Magazine, Feb. 2023
A Recipe from Rebecca: Roasted Carrot and Garlic Dip
‘This is delicious’, said a guest as we sampled Matt’s signature dirty martini a few weeks ago. ‘It is good, isn’t it?’, I replied. ‘No, I mean the dip’, he explained. It is good (and so were the martinis).
Roasted Carrot and Garlic Dip with Seed Dukkah
Serves 4-6 as a pre-dinner nibble.
Ingredients
For the Dip
500g carrots, unpeeled but cut into 2cm chunks
1 dried Canalside chile pepper
2 tablespoons olive oil + 1 more tablespoon olive oil (3 tablespoons total)
¾ teaspoon salt
1 whole head of garlic, left whole but with the top sliced off horizontally so you can see the actual garlic cloves
1½ tablespoons cashew or almond butter
1 lime, juiced (about 2 tablespoons)
For the Dukkah
1 tablespoon pumpkin seeds
1 tablespoon sunflower seeds
½ tablespoon cumin seeds
¼ teaspoon salt
¼ teaspoon sugar
½ teaspoon ufea chile flakes or any other mild chile flakes
Method
For the Dip: Heat the oven to the maximum setting (240C/220C fan). Line a baking tray with greaseproof paper.
Toss the carrots and chile pepper with 2 tablespoons olive oil and the salt. Spread on the baking tray.
Wrap the whole head of garlic in some foil and put that on the baking tray, too.
Put the baking tray in the oven and roast for 15 minutes. Remove the chile (set it aside), give the carrots and garlic a stir, and continue roasting them for another 15 minutes. Remove from the oven and set aside to cool a bit.
Once it is cool, unwrap the garlic and squeeze out the roasted garlic cloves into a small bowl.
Put the roasted garlic, carrots, chile, nut butter, and half the lime juice in a blender or food processer, and pulse until the mixture is coarsely blended. Season to taste with more salt or lime juice.
Transfer the dip to an attractive serving bowl and drizzle with the remaining tablespoon of olive oil and the remaining lime juice. Sprinkle with the dukkah (see below) and serve with something to dip into the dip. Sourdough crackers are good.
For the Dukkah: Heat a small, dry (i.e. no added oil) frying pan over medium heat. Add the seeds and stir, until everything seems a bit toasted. Let them cool a bit and then transfer them to a mortar along with the remaining ingredients. Bash them a bit until they are coarsely broken up.
Recipe adapted from Yotam Ottolenghi, Guardian, 26 June 2021
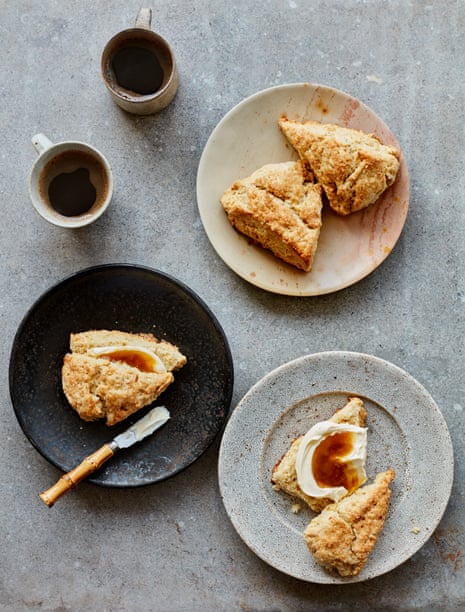
A Recipe from Rebecca: Ginger, Orange and Parsnip Scones
These buttery scones are exactly what you need to accompany a mug of tea on a cold
February day. They are easy and delicious. The parsnips are indetectable aside from the
sweet, nutty base-notes they bring to the flavour. Serve with thick cream and jam, or even on
their own, since they’re really rich and crumbly. If you left out the sugar I think they would
be good with ham and cheese, too.
Parsnip and orange scones
Makes 8 enormous scones
benjamina-ebuehi
Ingredients
450g plain flour
80g caster sugar
1 teaspoon ground ginger
zest of 2 oranges
1 tablespoon baking powder
¼ teaspoon salt
200g cold unsalted butter, coarsely grated
220g parsnips, peeled and coarsely grated
130ml milk, plus extra for brushing
Demerara sugar, to sprinkle over the top
Method
Heat the oven to 200C (180C fan), and line an oven tray with baking paper.
Mix the flour, sugar, ginger, orange zest, baking powder and salt in a large bowl, then add the
butter and, using your fingertips, rub it into the dry mixture until everything resembles fine
breadcrumbs. Mix in the grated parsnips.
Make a well in the centre and pour in the milk. Give the dough a quick mix, then turn it out
on to a lightly floured surface. Knead the dough quickly, bring it together and pat it into a
thick, round disc.
Cut the disc into eight triangular wedges. Put them on the baking tray, brush the tops with a
little milk and sprinkle them with demerara sugar. Bake for 20-25 minutes, until well risen
and golden.
Leave to cool, then serve with clotted cream and jam, or some butter and honey.
Recipe adapted from Benjamina Ebuehi, The Guardian, 14 Oct. 2022,
https://www.theguardian.com/food/2022/oct/14/parsnip-and-orange-scones-recipe-
benjamina-ebuehi
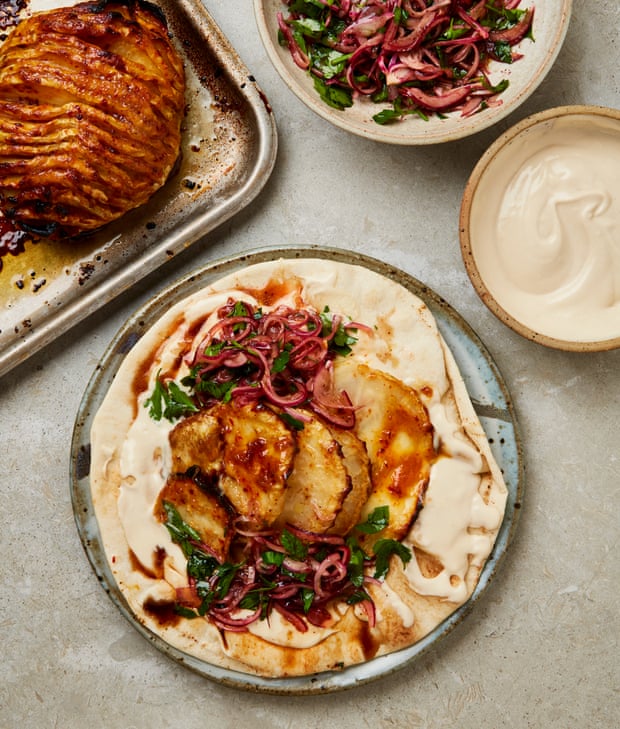
A Recipe from Rebecca (classics): Hasselback Celeriac with Miso and Red Onion
Meera Sodha says she created this recipe largely because she liked the sound of ‘hasselback
celeriac’. Name aside, this is very good. Serve the rich, miso-roasted celeriac and Turkish
salad inside a flatbread, topped with a drizzle of tahini sauce and you will have yourself a
sticky, messy treat. The recipe has several different components but is actually very
straightforward.
Incidentally, Hasselback is the name of a restaurant in Stockholm. The better-known
Hasselback potatoes were supposedly invented there in the 1950s.
Hasselback Celeriac with Miso and Red Onion
Serves 3
https://www.theguardian.com/food/2021/feb/13/vegan-recipe-hasselback-celeriac-meera-
sodha
Ingredients
For the celeriac
1 large or 2 small celeriacs (about 1-1.2kg total)
2 tablespoons olive oil
pinch of salt
For the miso glaze
60g white miso
½ tablespoon Turkish pepper
2½ tablespoons honey or brown rice syrup
1½ tablespoons lemon juice
For the tahini sauce
100g tahini
5 tablespoons water
1 tablespoon lemon juice
½ teaspoon salt
For the salad
1 large red onion, peeled, halved and sliced into thin half-moons
1 tablespoon pomegranate molasses
1 tablespoon lemon juice
1 teaspoon sumac
3 tablespoons olive oil
¼ teaspoon salt
1 large handful parsley, coarsely chopped
To Serve
6 flatbreads (look here for an excellent recipe)
Preparation
Heat the oven to 200C (180C fan).
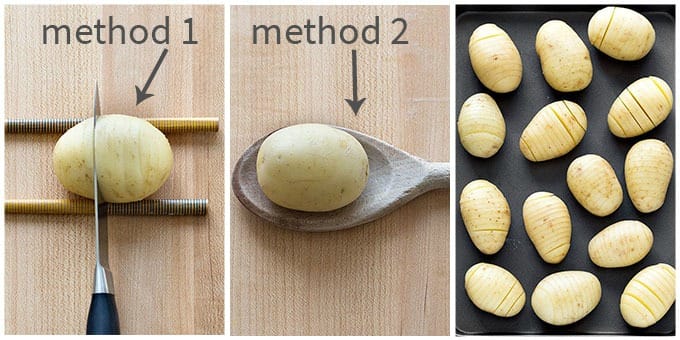
Chop off the base of the celeriac, and peel off the skin using a peeler or a sharp knife. If it is
large, cut it in half and lay it flat on its cut side. Using your sharp knife, cut slices at 5mm
intervals that go nearly but not all the way through, so that the slices are still joined at the
base, like the pages join the spine of a book. The illustration shows one way to ensure that
you don’t accidentally cut all the way through: place a wooden spoon handle or chopstick on
either side of the celeriac, so that when you cut, they prevent the knife from slicing all the
way to the work-top.
Now place the celeriacs on a baking sheet and drizzle with 2 tablespoons of oil and a pinch of
salt. Place in the oven and roast for 70-90 minutes. Check partway through and drizzle with a
little more oil if necessary. When they golden brown, they are ready for the glaze.
While the celeriacs roast, prepare the other components of the meal.
For the miso glaze: mix all the ingredients together in a small bowl.
For the tahini sauce: whisk all the ingredients together and put in a serving bowl.
For the salad: combine all the ingredients except the parsley in a serving bow. Mix together
using your hands, and scrunch up the onions a little to soften them. Then add the parsley and
set aside so the flavours can blend while the celeriac roasts.
Once the celeriac is golden and tender, brush with the miso glaze. Try to get some of the
glaze between the slits. Bake for another 8-15 minutes, or until the celeriac is sticky and
golden brown.
To serve, take the celeriac, salad, tahini sauce and bread to the table. Assemble your own
combination of flatbread layered with celeriac and pomegranate-onion salad, topped with a
generous serving of tahini sauce.
Recipe adapted from Meera Sodha, The Guardian, 13 Feb. 2021
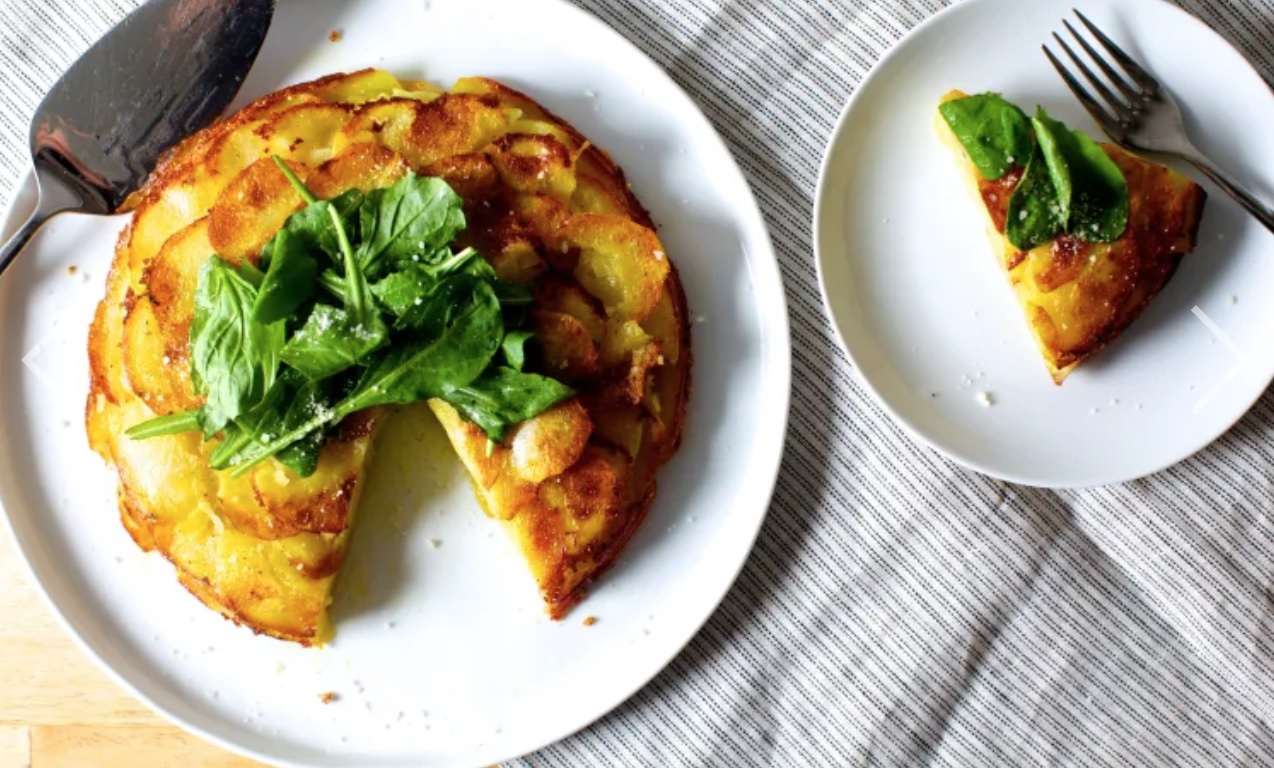
A Recipe from Rebecca: Cacio e Pepe Potatoes Anna
My sister gave me a Deb Perelman cookbook for Christmas. If you don’t know her food blog, let me recommend it to you. It and her cookbooks are full of excellent and straightforward recipes. Here is one: a crispy, cheesy, peppery, potato galette, baked in the oven and topped with rocket like one of those Pizza Express Soho pizzas that were fashionable in the 1990s. It’s really good and tastes as if it contains much, much more butter than it actually does. Just look at the picture. . .
In case you are wondering, cacio e pepe (‘cheese and pepper’) is a simple and delicious pasta
dish of spaghetti tossed with pecorino, a lot of pepper, and a little butter. It’s apparently
typical of Rome (not that I have ever been to Rome). Here’s a recipe:
https://www.bonappetit.com/recipe/cacio-e-pepe.
Cacio e Pepe Potatoes Anna
Serves 4
Ingredients
For the potato galette
50g grated pecorino, parmesan, or other hard, salty goat cheese
1 tablespoon cornflour or potato starch
½ teaspoon salt
½ teaspoon freshly ground pepper
30-45g butter, melted (or olive oil)
1kg potatoes, peeled if you like and sliced very thinly
For the salad
150g rocket
1 tablespoon olive oil
½ tablespoon lemon juice
Method
Assemble the potatoes: Heat the oven to 190C. Combine the cheese, cornflour or potato
starch, salt and pepper in a small dish. Taste it: it should have a strong salty-peppery kick.
Pour 1 tablespoon of the butter (or oil) into a 22cm-diameter ovenproof pan, and swirl it
around to coat the sides a bit.
Arrange a quarter of the potatoes in overlapping, concentric circles around the bottom of the
pan. Sprinkle with about 2 tablespoons of the cheese mixture and drizzle with a little more
butter (or oil). Repeat until all the potatoes are used up. There should be about 1 tablespoon
of the cheese mixture left over; set this aside.
Bake the galette: Heat the oven to 190C. Press a piece of nonstick baking paper over the top
of the pan and, using your hands, press down a bit to compact the potatoes. Put the pan,
baking paper and all, into the oven. If your pan has a lid you can put that on top, as well.
Bake for 35 minutes, by which time the potatoes should be nearly tender. Remove the pan
from the oven for a moment and press the paper down again, to further compact the potatoes.
Return to the oven (you can leave the lid off at this point, if you are using a lid) and bake for
a further 25-30 minutes, or until the potatoes are a beautiful golden-brown and very tender.
Press down one more time and remove from the oven. Set aside for a few minutes
Prepare the salad garnish: While the potatoes are cooking combine the oil and lemon juice in
a small jar with a lid, and shake vigorously to combine. Toss with the rocket and set aside.
Finish and serve: When you are ready to serve, run a knife around the edge of the pan to
loosen the potato cake. Place a large plate over the top of the pan and carefully invert the
galette onto the plate. It should be crispy and golden. Cut it into wedges and top with the
rocket salad. Sprinkle the remaining tablespoon of the cheese mixture over the top and serve
triumphantly.
Recipe adapted from Deb Perelman, Smitten Kitchen Every Day (2017).