Rebecca’s Recipe of the Week: Courgette in a Hot Pan
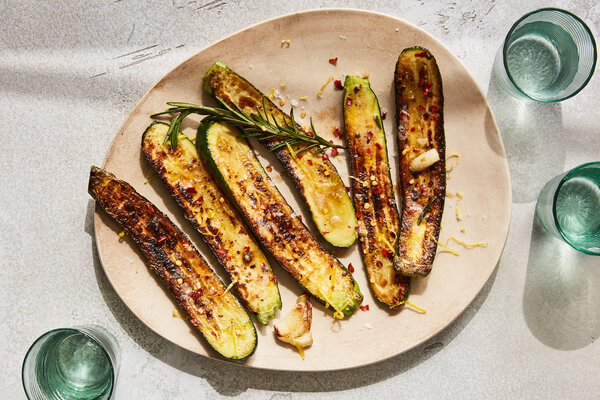
‘A zucchini and a steak may not have much in common, but, like steak, zucchini takes incredibly well to the method of quickly searing in a smoking hot pan’. So states Lidey Heuck in the New York Times, and she’s right. In this easy recipe courgettes are cooked fast to develop an appetising char, and then basted with butter, garlic and rosemary. We ate these topped with ricotta, alongside a tomato salad and some good bread.
Pan-Seared Courgettes
Serves 2-3
Ingredients
3 small courgettes (6 to 8 inches each)
1 tablespoon grapeseed, safflower or other high-heat cooking oil
salt and pepper
1½ tablespoons unsalted butter, or more to taste
1 garlic clove, peeled and smashed
1-2 tablespoons fresh rosemary, chopped
To garnish:
coarse sea salt
lemon zest
red-pepper flakes
Preparation
Trim the ends off the courgettes and cut them lengthwise into planks about ½-inch thick. Pat them dry, pressing gently but firmly on both sides to absorb any moisture.
Heat a large (12-inch) cast-iron or stainless-steel skillet over medium-high. If you have a ridged pan this is a good opportunity to use it. Add the oil and heat until it’s almost smoking.
Add the courgettes to the pan and press lightly with a spatula so that the planks make contact with the pan. Don’t crowd them—if you do they will steam rather than sear.
Sprinkle the tops with salt and pepper, and cook for about 3 minutes, until the courgettes are nicely charred on the bottom. Lower the heat to medium, flip over the courgettes, and season again with salt and pepper. Cook for 2 to 3 more minutes, until the bottoms are charred.
Turn the heat to low and add the butter, garlic and rosemary. Carefully tilt the pan, letting the garlic and rosemary cook in the butter for 30-60 seconds, until the butter has begun to brown. Spoon the butter over the courgettes, and cook for another minute, flipping them a few times to coat both sides with the butter.
Transfer the courgettes to a serving platter, along with the garlic and rosemary, and spoon any butter that’s left in the pan on top. Garnish with sea salt, lemon zest and red-pepper flakes, and serve hot.
Recipe adapted from New York Times Cooking
Rob’s Recipe of the Week: A slow burner
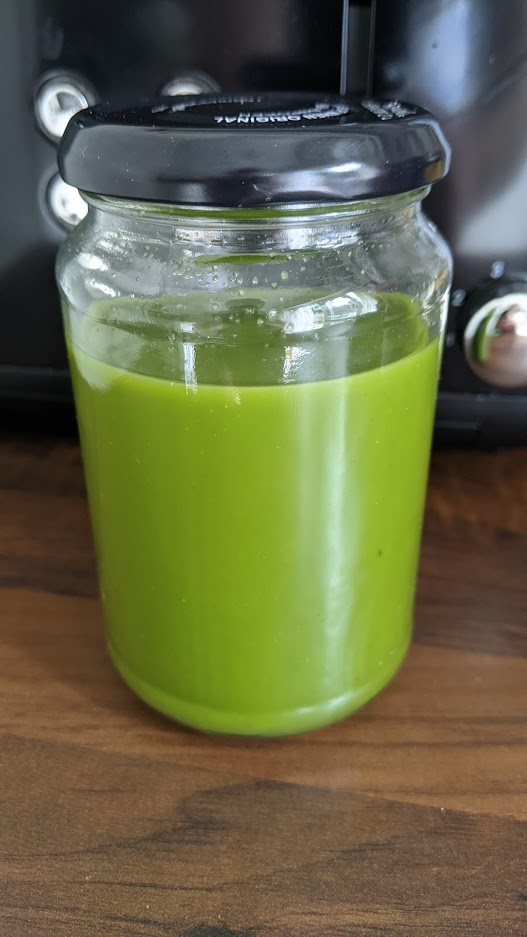
This week I made green fermented hot sauce so I thought I would share the recipe. It’s a bit of a slow burner (excuse the pun) in that it won’t be ready to eat until next summer, but it’s a fun little project so bear with me…
Green fermented hot sauce
Ingredients (scale to suit your harvest):
450g green chillies
4 garlic cloves, peeled and crushed
3 tablespoons salt
4 cups warm water
Method:
To make chillies:
The first thing you need to do is reserve some seeds from the dried chillies in the share, and then sow them into modules or pots inside, early in 2022, repotting as they grow. I grew 9 plants in the end, which have happily produced all summer outside. I picked chillies green to stimulate more growth and froze them until I had enough for a batch of sauce. Approx 1 month of harvest gave me 225g of chillies which resulted in 1 jam jar of sauce. Beware it’ll be very hot – Frank’s hot sauce has nothing on the Canalside chillies!
To make sauce:
Remove tops of peppers and split in half lengthwise. You might want to wear gloves for this. Tightly pack a jar with peppers and garlic, leaving a little headspace
Mix salt and warm water to form a brine and pour this to completely cover the chillies
Fill a freezer bag (or alternative) with water and use this to weigh down the chillies, keeping them submerged
Cover with a kitchen towel and leave in a cool dark spot (such as a cupboard) for 3 or 4 days or until brine appears slightly cloudy and bubbly. The longer it sits, the funkier it will get. Don’t let it go past 7 days or it will be too funked (even for you). It’s worth opening the jar every day or so to release built up air pressure.
Strain the brine and reserve it. Transfer the chillies to a high-speed blender. Add 1 cup of the reserved brine, 1 cup of fresh coriander (omit if you don’t like the taste) and 1/4 cup apple cider vinegar to the blender, and process until very smooth. Strain the pulp through a fine-mesh sieve, and bottle.
Store in the refrigerator. The flavours will continue to develop and get more complex over time, and the heat will mellow. This will keep for at least 12 months in the fridge.
Adapted from: https://www.anarchyinajar.com/blog/2020/6/green-fermented-hot-sauce
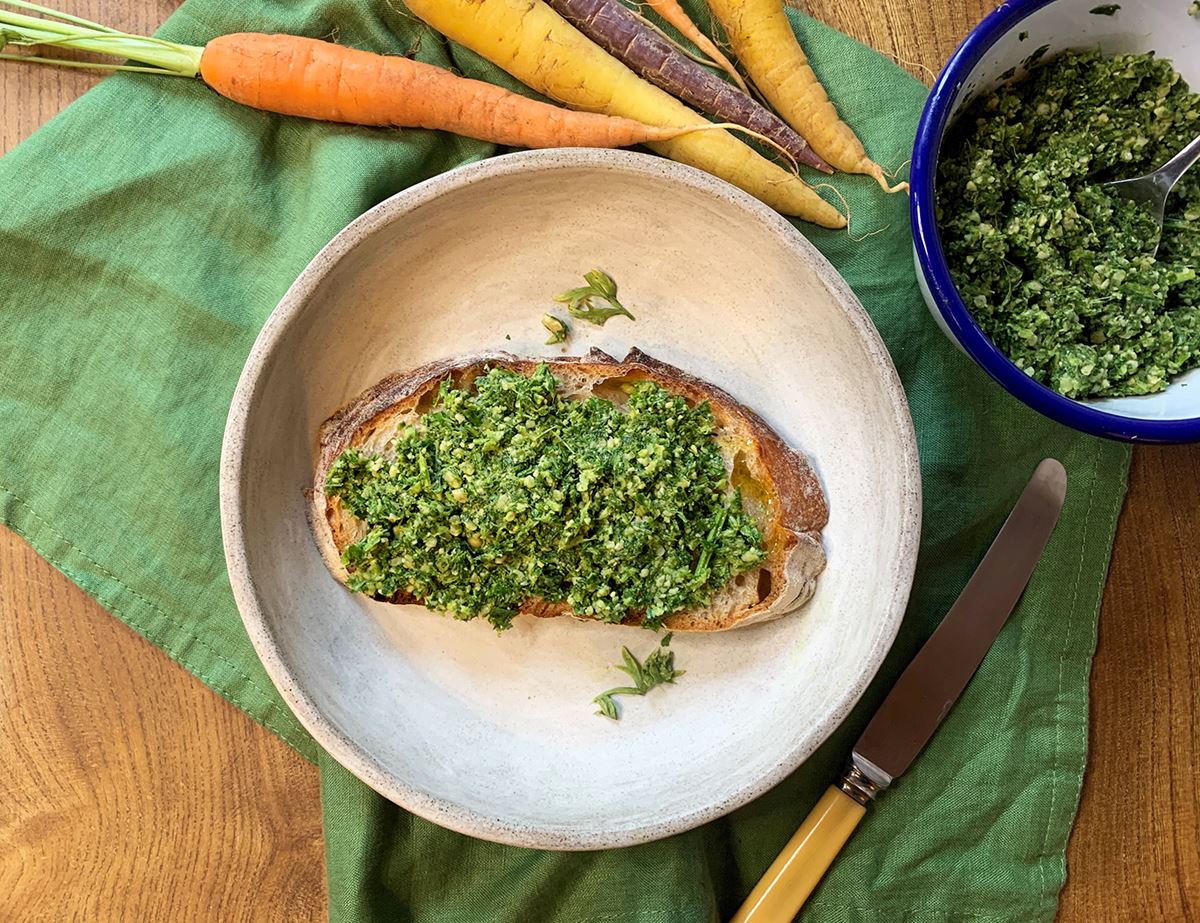
Ali’s Recipe of the Week: Waste Not Want Not Pesto
With new season carrots appearing in the share for the first time this week, there’s an opportunity for an interesting way to use the fronds, saving them from the compost heap. Carrots tops have a grassy, parsley-like flavour that makes them ideal for blitzing into a quick and simple pesto. It’s sensational served with roasted carrots, spread on toast, tossed through pasta or stirred with a few glugs of olive oil to make a delicious salad dressing.
Carrot top pesto
Ingredients
Bunch of carrots (tops only) – for best results discard any tougher larger stems and just use the feathery ones
½ lemon, juice only
1 garlic clove, peeled
75g cashews, walnuts or almonds
3 tbsp olive oil
Sea salt
Freshly ground pepper
Handful of grated Parmesan (optional)
Prep: 10 mins
Method
1.Trim the carrot tops off the carrots and thoroughly wash the tops to get rid of any dirt. Roughly chop them.
2.Pop the carrot tops into a food processor and add the other ingredients. Whizz till you have a coarse paste. Taste and add more salt or pepper if you think the pesto needs it. Loosen with a little more olive oil or a splash of water if needed.
3.Herb is the word: add a handful of fresh herbs to the mix, if you like. Parsley, mint, oregano and basil would all make excellent additions.
Adapted from: https://www.abelandcole.co.uk/recipes/carrot-top-pesto
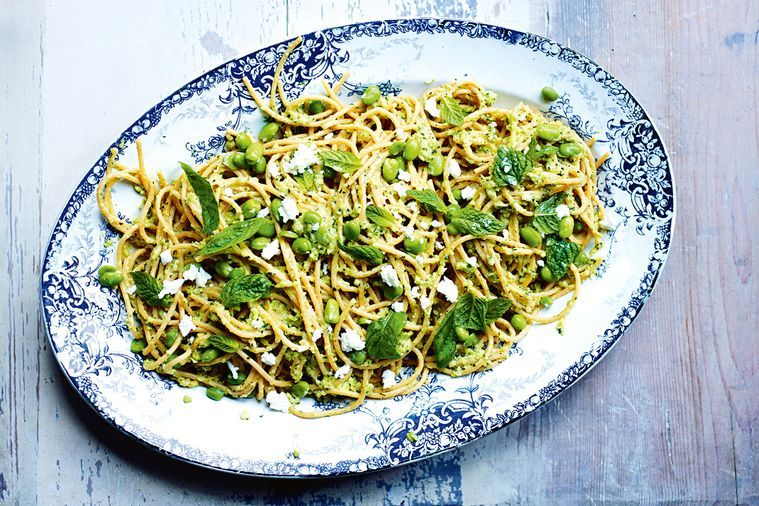
Rob’s Recipe of the Week: Broad bean pasta
This recipe was a discovery late last summer and ended up being our go-to for broad beans. I’ve had it in the side-lines ever since and now broad beans are finally back, it’s time to share! This recipe was even a hit during a solid week of rain under canvas in the Lakes.
Spaghetti with broad bean pesto
INGREDIENTS
500g dried spaghetti
500g broad beans, blanched, skins removed
1 small garlic clove
1/2 bunch mint, leaves picked, plus extra to serve
Juice of 1/2 a lemon
1/4 tsp cayenne pepper
2 tbs extra virgin olive oil
30g feta, plus extra to serve
METHOD
- Cook pasta in a pan of boiling salted water according to packet instructions until al dente. Drain, reserving a little cooking liquid.
- Whiz 200g beans in a food processor with the garlic, mint, lemon juice and cayenne. Add oil and feta, and pulse to combine (loosen with a splash of the cooking liquid, if necessary). Season.
- Working quickly, toss the drained pasta and the broad bean pesto together on a serving dish. Sprinkle with the extra mint and feta, then top with remaining beans. Serve immediately.
Recipe adapted from: https://www.delicious.com.au/recipes/spaghetti-broad-bean-pesto/Meqkhuj6
Rebecca’s Recipe of the Week: Beetroot, Lentils, Cheddar
Beetroot with feta, or goat cheese, is a classic combination, but other cheeses are available. Cheddar, for instance. Lentils add bite and substance to this salad, and the mustard brings a complementary zing that combines well with the cheddar. You can use either red or yellow beetroot in this salad, which makes a good lunch or simple supper.
Beet and Lentil Salad With Cheddar
Serves 4

Ingredients
For the salad:
500g beetroot
300g green lentils, rinsed
1 garlic clove, smashed
1 teaspoon salt
approx. 2 cups rocket or another green such as shredded Swiss chard
5g dill, parsley, mint or coriander, roughly chopped
50g Cheddar, roughly crumbled
handful walnuts or hazelnuts, toasted in a dry frying pan for a few minutes
For the apple cider vinaigrette:
1 small garlic clove, grated
2 tablespoons apple cider vinegar
3 tablespoons extra-virgin olive oil
1 tablespoon maple syrup or brown sugar
½ teaspoon Dijon mustard
¼ teaspoon salt
several grinds of freshly ground pepper
Preparation
Place the beetroot in a microwave-proof bowl. Add 1 cup water to the bowl and cover the bowl tightly with clingfilm. Microwave for 20 minutes. By now the clingfilm should have collapsed tightly onto the beetroot, creating a sort of vacuum-seal. With your finger prod the beetroot through the clingfilm to see how soft it is. If it feels tender, the beetroot is done. If not, put it in for another 5 minutes and test it again. Keep going until the beetroot feels tender. Once it’s done, remove it from the microwave, peel back the clingfilm, drain, and set aside.
Meanwhile, cook the lentils: in a medium pot, add the lentils, salt, garlic and 1 litre of water. Bring to a boil over high. Reduce heat to medium, cover and simmer for 20 to 25 minutes until just tender. (The lentils should still have some bite). Drain in a colander and stir to break up and evenly distribute the garlic. Let the lentils cool slightly.
Once the beetroot is cool enough to handle, set about peeling it. The peel should come off fairly easily with a knife. Cut the beetroot into 1cm cubes, or slice into small wedges.
While the lentils cook, prepare the vinaigrette: in a large serving bowl, whisk the garlic, vinegar, oil, maple syrup and mustard with the salt and pepper. Add the warm lentils to the serving bowl, then add the beets, greens, nuts and herbs. Toss together and then stir in the the cheese. Don’t stir too vigorously, because you don’t want the cheese to turn crimson from the beets, and serve.
Recipe adapted from Hetty McKinnon, New York Times Cooking
Rebecca’s Recipe of the Week: Sicilian Pasta
This is a bit of a production, but the flavours you will create are remarkable. The dish tastes of the sea, of warm evenings outdoors, of blue skies. Make it now.
Pasta with Cauliflower, Currants, Pine Nuts and Saffron Onions
Serves 4
Ingredients
80g currants (or raisins)
230ml white wine
60ml olive oil, plus 2 tablespoons more
2 medium onions, peeled and diced
salt
1 teaspoon saffron threads
100g coarse breadcrumbs
700g cauliflower, cut into very small florets
3 garlic cloves peeled and chopped
8 anchovy fillets, rinsed and chopped
1 teaspoon red pepper flakes
handful of parsley, large stalks removed and coarsely chopped
12 sprigs of marjoram, coarsely chopped
450g short pasta shapes
Preparation
First plump the currants: put the currants and wine in a small saucepan over low heat. Bring to the boil and—as soon as it reaches the boil—remove from the heat and set aside for at least 30 minutes. The currants will absorb the wine.
Now prepare the saffron water: put the saffron and 60ml of water into a small bowl. Heat in the microwave for 30 seconds or so, or until the water boils. The moment the water boils remove and set aside for at least 5 minutes. (Of course you can do this on the stove.)
Now make the saffron onions: put 60ml of oil into a frying pan over low heat. When hot add the onions and a pinch of salt and cook for about 8 minutes, or until the onions are beginning to soften, but still remain golden.
Add the saffron water and continue to cook, stirring occasionally, for 10-15 more minutes, or until the onions are very soften and have turned a beautiful saffron colour. Don’t let them burn.
Toast the breadcrumbs: toast the breadcrumbs in a dry frying pan for 5-8 minutes, or until they are a golden colour. Keep an eye on them so they don’t burn. You can add some oil if you prefer. You can also make them in a 150C oven—they’ll take about 20 minutes.
Meanwhile, cook the cauliflower: put the remaining 2 tablespoons of olive oil and 60ml of water into a separate pan. Bring to the boil and then add the cauliflower. Cover and cook over medium-low heat for about 15 minutes, or until the cauliflower is extremely soft. Check every now and then to make sure there is enough water—don’t let this boil dry—and add more if necessary.
Once the cauliflower is soft, make a well in the middle of the cauliflower and add the garlic, anchovies and pepper flakes. Sizzle over low heat until the anchovies have broken down and merged with the rest of the ingredients in the pan.
Now add to the cauliflower the saffron onions, currants (and any remaining wine), parsley and marjoram.
Your sauce is now ready.
Cook the pasta according to the package directions whenever you are ready to eat. Reserve about 60ml of the cooking water when you drain it. You will add this to the finished dish.
To serve, combine the pasta and sauce and toss well. Add the reserved cooking water and heat over a low flame for a minute or two until it’s hot and well blended. Top with the breadcrumbs and serve with a glass of white wine, imagining yourself on a balcony in Sicily.
Recipe adapted from Christopher Boswell, Pasta: Recipes from the Kitchen of the American Academy in Rome (2013).
Rob’s Recipe of the Week: Leek Pasta Bake
I’ve had this recipe on my list to try for a while but the stars have yet to align with me having everything I need in stock. One day!
Baked Pasta and Leeks with Anchovy Cream
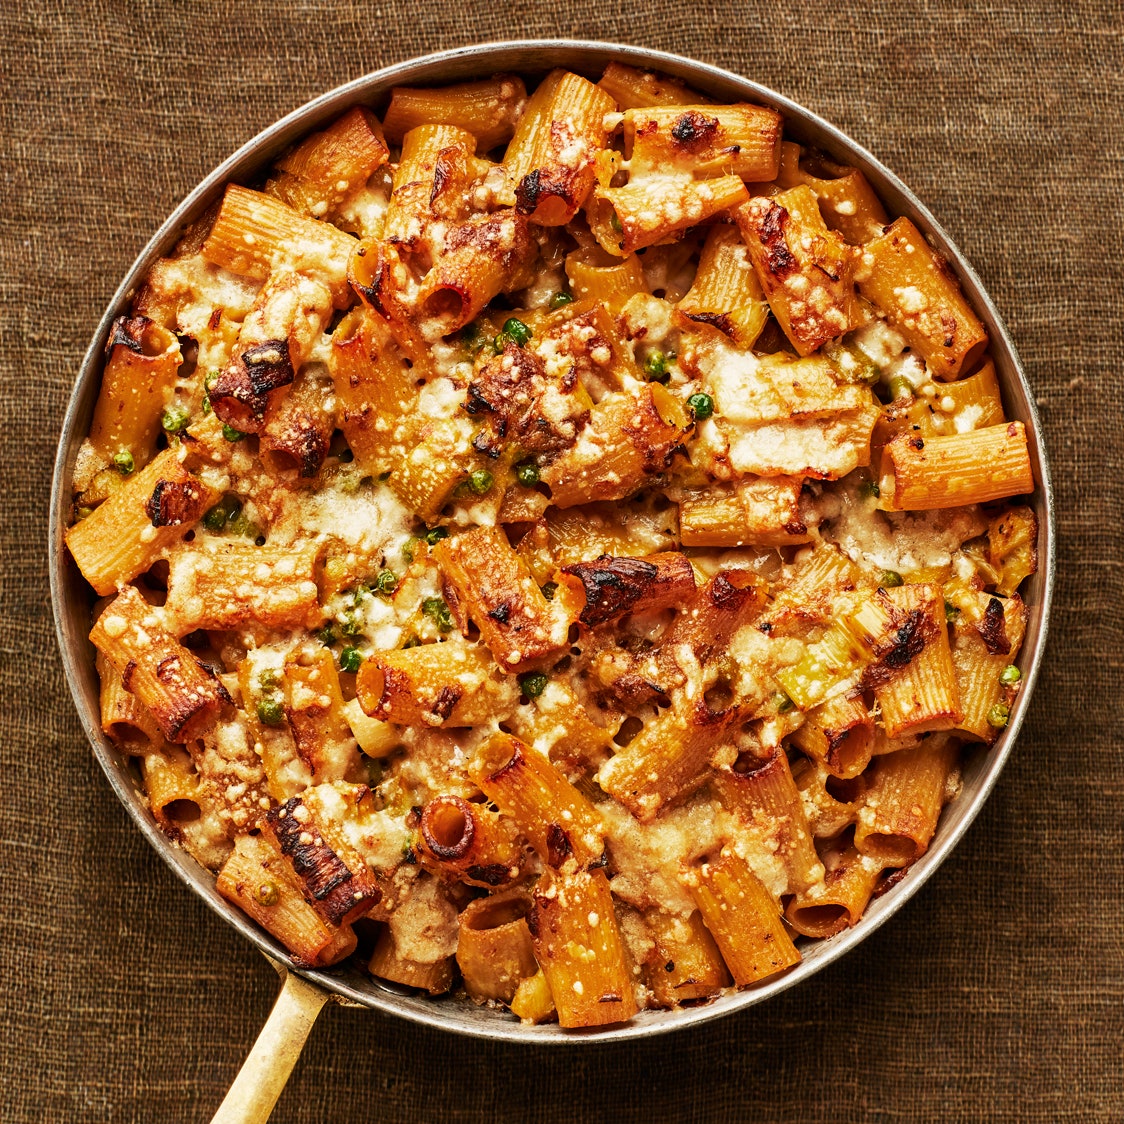
Ingredients (4-6 servings)
1lb. short pasta (such as rigatoni, penne, or conchiglie)
Kosher salt
¼ cup extra-virgin olive oil
3 large leeks (about 600g of), white and pale green parts only, trimmed, sliced ½” thick
15 oil-packed anchovies, drained (from a 1.5-oz. tin)
6 garlic cloves, thinly sliced
1 tsp. mild red pepper flakes or ½ tsp. crushed red pepper flakes
Freshly ground black pepper
2 cups double cream
3oz. Parmesan, finely grated, plus more for serving
10-oz. frozen baby peas, thawed in warm water, drained
Method
Preheat oven to 200°. Cook pasta in a large pot of boiling salted water, stirring occasionally, until very al dente, about 2 minutes less than package directions. Drain and set aside.
Meanwhile, heat oil in a large Dutch oven or large high-sided skillet over medium. Add leeks; season with a couple pinches of salt. Cover and cook, stirring occasionally, until tender and golden around the edges, 6–8 minutes. Uncover and add anchovies, garlic, red pepper flakes, and several grinds of black pepper. Cook, stirring occasionally, until anchovies are disintegrated and garlic is tender, about 5 minutes.
Add cream and 3 oz. Parmesan. Bring to a simmer; season with salt and black pepper (it should taste a bit salty because the pasta will absorb some seasoning as it bakes). Add peas and reserved pasta and toss gently to coat; top with more Parmesan. Transfer pasta to oven; bake until top is crisp and cream is bubbling around the edges, 25–30 minutes. Let cool slightly before serving.
From https://www.bonappetit.com/recipe/baked-pasta-and-leeks-with-anchovy-cream
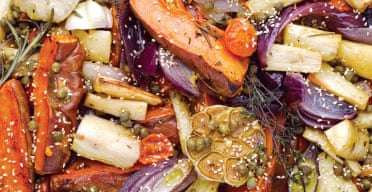
Rebecca’s Recipe of the Week: Parsnips, Squash, Capers, Parsley
Everyone knows roasted vegetables are good. Adding a punchy caper and parsley vinaigrette makes them even better. You can use different vegetables (potatoes, say), and you can also vary the vinaigrette by adding harissa paste, or using basil or mint instead of parsley.
Served with rice or another grain to soak up the vinaigrette, this makes a good weekday dinner. You can add some salted yoghurt if you want additional creaminess (and protein).
Roasted Parsnips and Squash with Caper Vinaigrette
Serves 3-4
Ingredients
For the roast veg
700g parsnips, peeled
700g squash or pumpkin
120ml olive oil
4 medium red onions (optional)
4 sprigs of thyme
2 sprigs of rosemary
1 teaspoon salt
Several grinds of black pepper
1 whole head of garlic
10-20 small tomatoes, cut in half
For the dressing
1 large lemon
2 tablespoons olive oil
3 tablespoons capers, roughly chopped if they are large
1.5 teaspoons honey or maple syrup
½ teaspoon Dijon mustard
big handful of parsley, chopped fine
½ teaspoon salt
Several grinds of black pepper
Preparation
Prepare the roast veg:
Preheat oven to 190C.
Cut each parsnip into batons about 5cm long and 1.5 wide—but if they are small it is fine to leave them whole. They will look amusing in the finished dish.
Using your hand, scoop the seeds out the squash. (You can use these to make a nice nibble: https://www.101cookbooks.com/toasted-pumpkin-seeds/.) Peel the squash and cut it into chunks roughly the same size as your parsnips.
Peel the onions (if using) and cut each into 6 wedges.
Cut the head of garlic in half horizontally. Don’t break it into individual cloves or try to peel it! Just cut the whole thing into two pieces, horizontally.
Place the parsnips, squash, onions and garlic into a roasting tin and add 120ml olive oil, the thyme and rosemary, 1teaspoon salt, and some pepper. Mix well and spread it out in the pan so the vegetables are not all heaped on top of themselves. Place in the oven and roast for about 20 minutes, or until the vegetables look golden and are pretty tender.
After 20 minutes add the tomatoes, and roast for another 10 minutes or so, until the vegetables are completely tender when prodded with a fork and the tomatoes have softened.
While the vegetables are roasting prepare the vinaigrette: zest the lemon and then cut it in half so you can juice it. Combine the lemon juice (about 2 tablespoons) and zest with the other ingredients in a small bowl. Whisk to combine.
Finish the dish: Once the vegetables are done, remove them from the oven and pour the vinaigrette over the hot vegetables. Toss to combine and serve with rice or some other grain.
Recipe adapted from Yotam Ottolenghi, Plenty (2010).
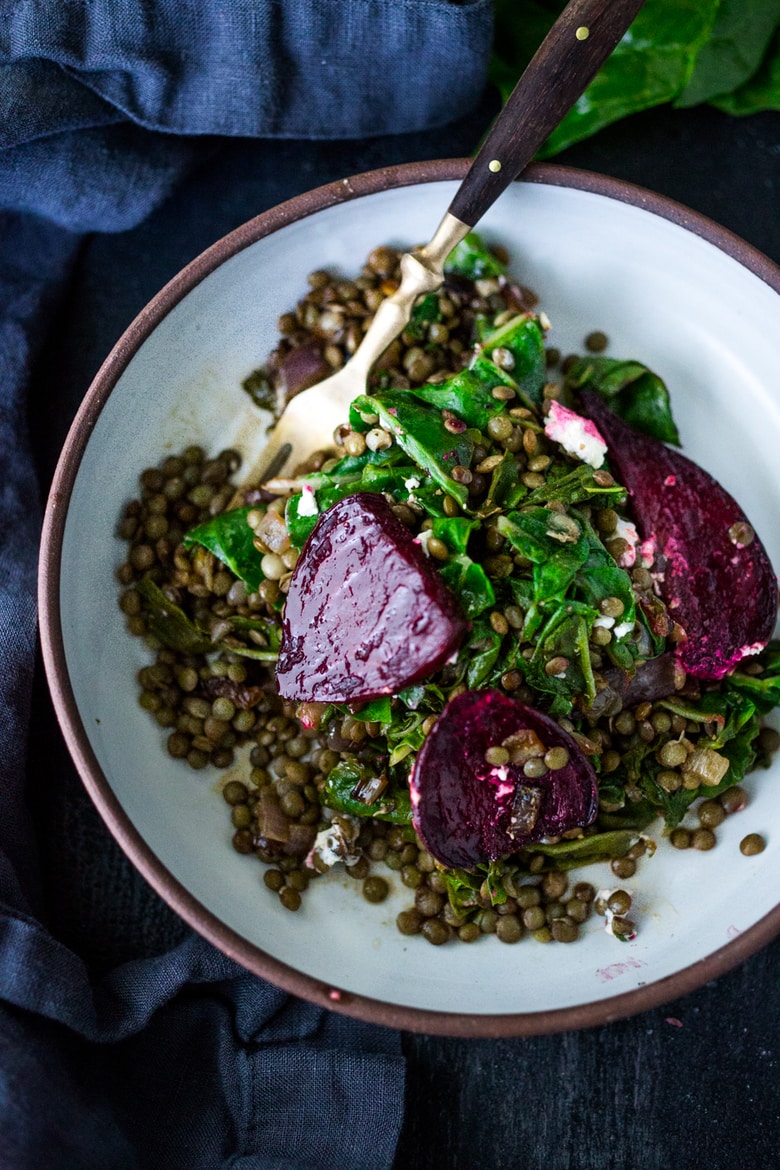
Rob’s Recipe of the Week: Beets and Chard from the Share
As always I continue to try to find new ways to enjoy roasted beetroot as it takes us through the winter and this week I think I’ve found a good one. Either a fun lunch or a dinner padded out with some nice bread, you choose!
Warm lentils with roasted beets, wilted chard & goat cheese
Ingredients
3–4 beetroot ( enough for 2 people)
2 cups cooked lentils
2 tablespoons olive oil
½ a red onion- diced
3 garlic cloves- rough chopped
4 cups (packed) swiss chard or rainbow chard- chopped (or sub beet greens, spinach)
salt and pepper to taste
1 tablespoon balsamic vinegar, more to taste
¼ cup goat cheese crumbles
2–3 tablespoons fresh basil, or parsley.
Instructions
Preheat oven to 220C. Scrub and trim beetrot and cut into ½ inch slices or wedges. Drizzle with olive oil and roast until tender, about 25- 30 minutes.
If cooking lentils, place ¾ cup dried lentils in a small pot and cover with 3 inches of water and a pinch salt. Bring to a boil, cover and turn heat down to a simmer, cook about 25-30 minutes or until tender but still hold their shape. Drain.
In a large frying pan, heat 2 tablespoons oil over medium high heat. Add diced onion and saute 3-4 minutes. Turn heat down to medium, add garlic and cook 2 more minutes, until golden and fragrant.
Lower heat to medium low. Add chard and gently wilt, just slightly, about 2-3 more minutes. Season with salt and pepper.
Add 2 cups cooked lentils to the frying pan, gently folding them in and warming. Season again with salt and pepper.
Add beetrot and splash with 1 tablespoon balsamic vinegar. Let vinegar cook down for just a couple of minutes so it’s not so acidic. Taste, add more vinegar if you like, cooking it down. Sprinkle with goat cheese and herbs. Taste again, if it tastes bland it most likely needs salt. Serve immediately.
From https://www.feastingathome.com/warm-lentils-wilted-chard-roasted-beets-and-goat-cheese/
Rebecca’s Recipe of the Week: Spicy Potato-Parsnip Soup with Preserved Lemon
Here is a good soup for a blustery spring day. The warming spices—cumin, coriander, paprika—give this a North African flavour, as does the preserved lemon. You can make this with any ratio of potatoes or parsnips that you prefer, including all potato or all parsnip. We enjoyed this with a glass of very robust Bulgarian merlot but other drinks are available, as they say.
Note that this involves only one pan, and so results in minimal washing-up.
Spicy Potato-Parsnip Soup with Preserved Lemon
Serves 2
Ingredients
For the Soup
2 tablespoons rapeseed or olive oil
1 onion, roughly chopped
2 garlic cloves, roughly chopped
½ dried Canalside chile, deseeded if you don’t want it too hot and chopped, or 1 medium-hot dried chile, treated similarly
1 teaspoon ground cumin
1 teaspoon ground coriander
½ teaspoon sweet smoked paprika (use a Spanish brand)
¼ cup preserved lemon, chopped fairly coarsely
500g peeled potatoes and parsnips, in any ratio (you can use all potatoes or all parsnips, too)
About 750ml stock (I think you could also use water, to be honest)
1 teaspoon salt
To decorate the Soup
4 tablespoons yoghurt
a little more smoked paprika
a little extra preserved lemon, coarsely chopped
Preparation
Heat the oil in a large saucepan over medium heat. Add the onion, garlic and chile, reduce the heat to low, and sauté gently for 10-15 minutes, or until the onion is soft but not brown. Stir in the cumin, coriander and paprika and cook for a minute or two more, until everything smells fragrant.
Meanwhile, cut the peeled vegetables into chunks of about 2cm.
When the spices in the pan are fragrant add the vegetables and the preserved lemon and pour in the stock (or water) and the salt. Bring to a simmer and cook for 30-40 minutes, or until the vegetables are very tender indeed.
Using a potato masher, mash the vegetables to give the soup a coarse texture. Hugh F-W suggests passing the whole thing through a sieve to create a smooth puree, but this seems both a lot of work and a dubious outcome as in my view a more rustic texture suits this soup far better. But it’s up to you. Add a bit of water if it still seems a bit thick to you, and check to see if it would benefit from a bit more salt.
To serve, dish your soup into bowls and garnish each with several spoonfuls of yoghurt, a sprinkling of paprika, and some golden cubes of preserved lemon.
Recipe adapted from Hugh Fearnley-Whittingstall, River Cottage Veg Every Day! (2011).